
Menu UI Implementation
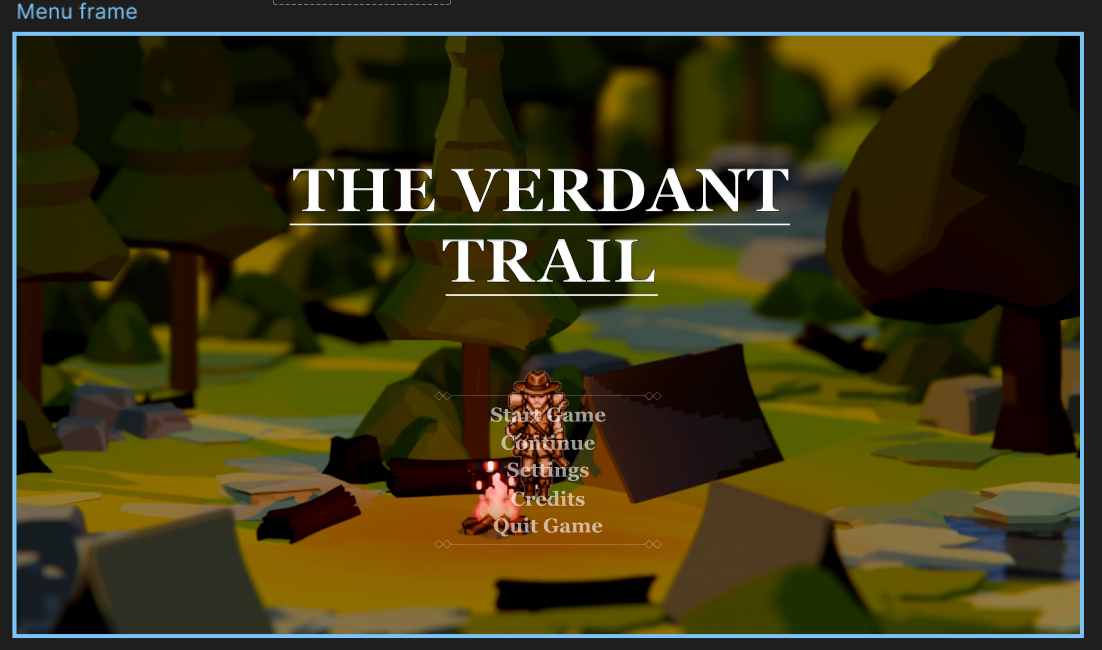
When creating the main menu, I first designed the menu prototype in Figma.
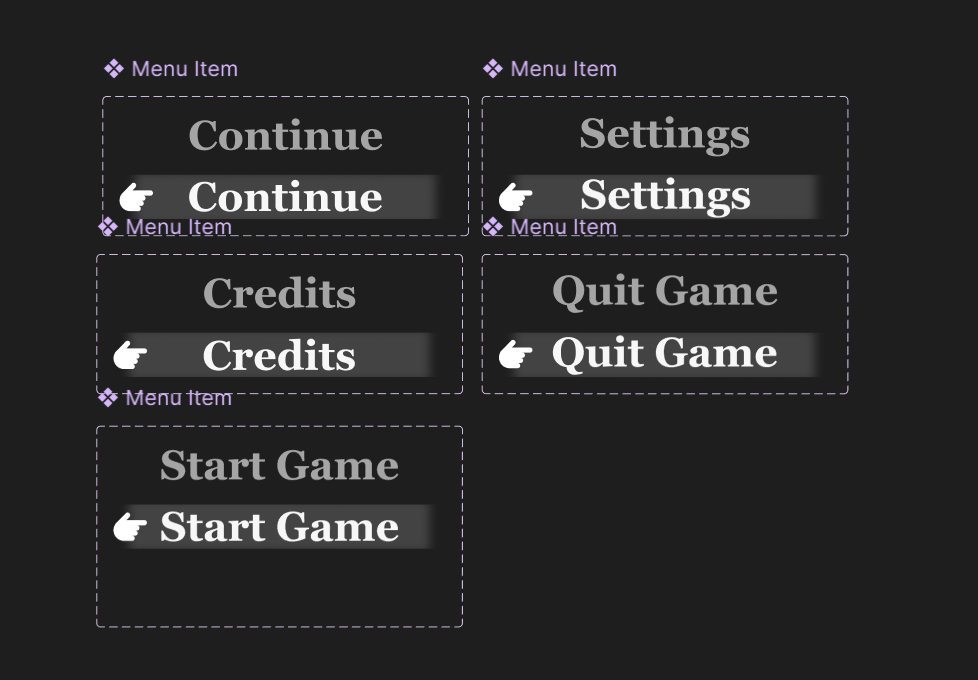
For the buttons, I also designed two states in Figma: a normal state and a selected/highlighted state. The normal version is more subtle, while the highlighted version appears when the player hovers over or selects a button. This makes it clearer which menu option is currently active.
After finishing the Figma design, I exported the UI assets and imported them into Unity as the visual assets for the main menu.
Menu Scene Structure
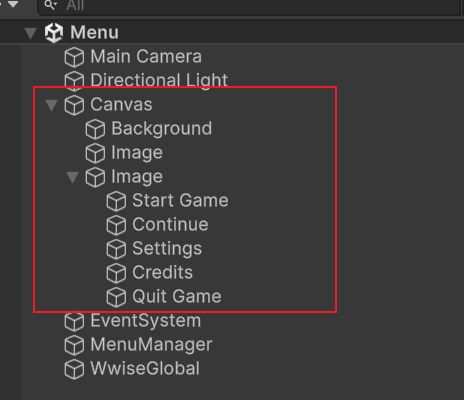
In Unity, I placed the main menu in a separate Menu scene. The menu structure mainly consists of a Canvas, background image, menu buttons, EventSystem, and MenuManager. All buttons, including Start Game, Continue, Settings, Credits, and Quit Game, are placed under the Canvas, making it easier to manage their layout and interaction logic.
Menu Button Interaction
The menu buttons are Unity UI Buttons. The main buttons include:
Start Game
Continue
Settings
Credits
Quit Game
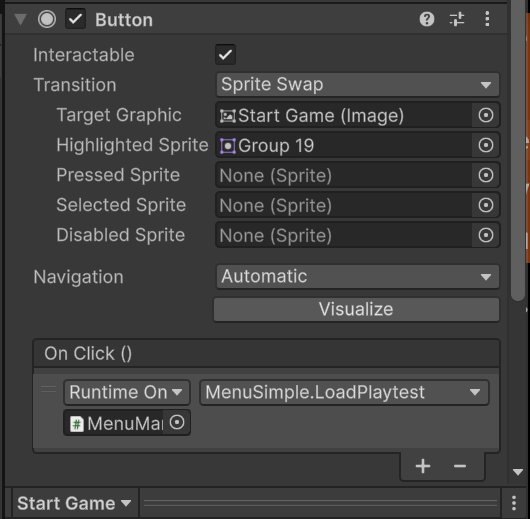
The menu buttons use Unity UI Button’s Sprite Swap transition for interaction feedback. Each button has a default image, and a highlighted image is assigned in the Highlighted Sprite field. When the player hovers over or selects a button, Unity automatically switches it to the highlighted version, making the menu interaction clearer visually.
Start Game and Quit Logic
The menu functions are controlled by MenuManager, which uses a simple MenuSimple script to handle button actions.
The main method is LoadPlaytest():
					public void LoadPlaytest()
{
    SceneManager.LoadScene("Playtest Scene");
}
When the player clicks Start Game, Unity calls this method and loads the main Playtest Scene.
The quit function is handled by QuitGame():
					public void QuitGame()
{
    Application.Quit();
}