

The goal of this phase is to establish the project’s foundation and mechanics. This does not necessarily mean polished, or even high quality, because those can come with testing in the subsequent phases.
My Tasks:
- Child Character 3D Model / UV / Texture
- Dog Animations
- Walk
- Run
- Bite
- Bite and Drag
- Dog Mechanics
- Walk
- Run
- Bite
- Bite and Drag
- Iterate on fetch quest tasks until a solid foundation is formed
Josh’s Tasks:
- Child Character Rig
- Dog Rig
- Basic House 3D Model
- Living Room Furniture
- Kitchen Furniture
- Upstairs Room Furniture
- Iterate on fetch quest tasks until a solid foundation is formed
Weekly Schedule:
| Week | Indiana | Josh |
26th Jan – 1st Feb | – Create, UV cut, and texture human 3D model | – UV cut and rig the dog model |
| 2nd – 8th Feb | – Create dog animations (walk, run, bite, bite and drag) | – Rig the human model |
| 9th – 15th Feb | – Implement animations/mechanics programming – Come up with ideas for fun fetch quests | – Finish iterating on greybox design in accordance to fetch quest ideas – Begin 3D modelling whitebox |
| 16th – 22nd Feb | – Implement animations/mechanics programming – Iterate on puzzle design, level design, and fetch quests | – Finish 3D modelling whitebox |
All Deliverables:
- Child Character 3D Model (UV and textures included)
- House 3D Model
- Dog Rig
- Walk, Run, Bite, Bite and Drag animations
- Walk, Run, Bite, Bite and Drag mechanics
- A solid idea for the fetch quest tasks
3D MODELLING
My focus this week was soley on the child model. I was starting with one of my strengths (3D design) to ease myself into the fact that I was going to have to become a programmer.
On the first official day of the semester, I wanted to do something fun and experimental to ease myself in to the growing fact dawning on me that I was going to have to become a programmer.
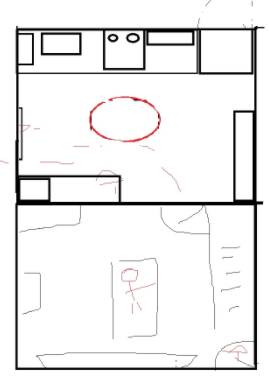
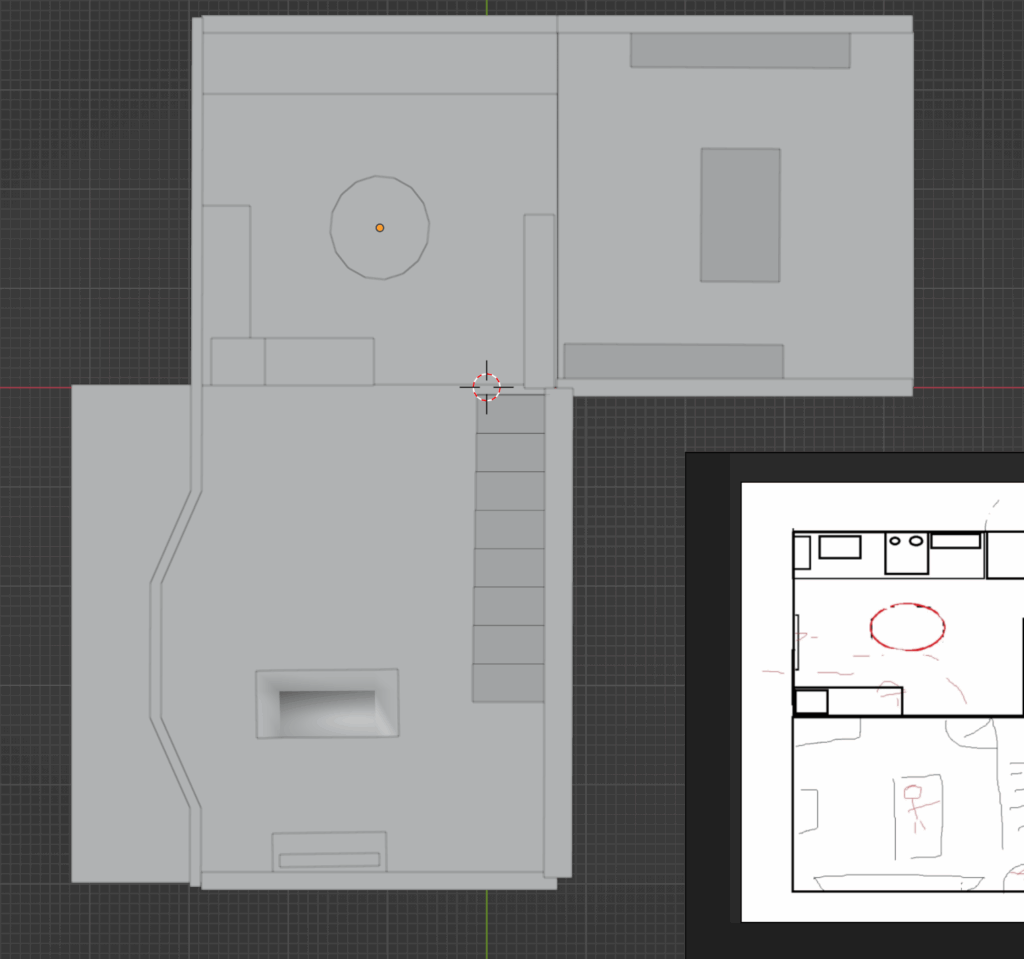
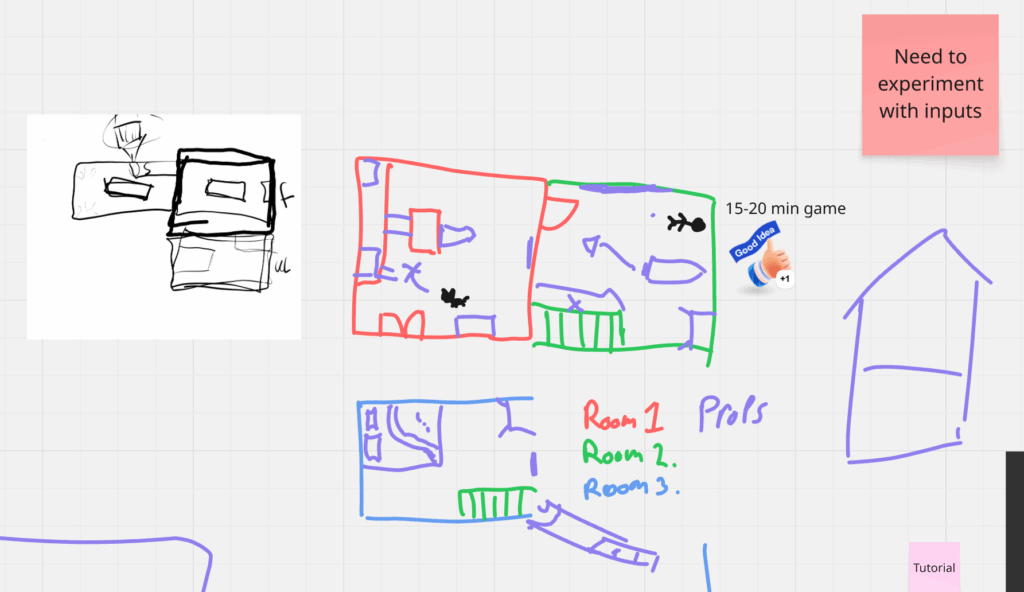
So after Monday’s lesson, Josh and I started on some basic level design. We quickly decided on a third room that would not be visible from the start camera, and thus would cause players to discover the camera-toggle mechanic. I created and implemented a new greybox from Blender to Unity. This did pose a small problem with the current camera script setup, but after a bit of fiddling around, managed to streamline the script so that not only could I have a third set of rooms, but could easily add as many rooms with as many cameras as I wanted! This was a big boost of confidence to me, as I’d spent the last month slowly convincing myself I couldn’t code at all.

Over the break, I found a fur shader package for Unity, so decided to test it out and see if it would actually work. And it worked beautifully, with one caveat — the shader would cover the entire mesh. This meant the collar, eyes, and mouth had fur too, unless I made them separate objects. After some careful deliberation, I decided on “fur fit lit”, as that was the closest to dog fur.

But the majority of the week was spent 3D modelling the owner. Luckily I already had concept art and a turnaround from last semester, so the design wasn’t literally starting from ground 0. I’d also had the foresight to make the design relatively easy to model, and furthermore (hopefully) easy to animate. The child has short hair, and their mouth is covered with a mask — the most difficult thing was actually the big, bulky jacket, and the hands. These became seperate, but parented objects, along with the mask, eyes, and hair for ease. Most of the design’s aesthetic would come from the textures.

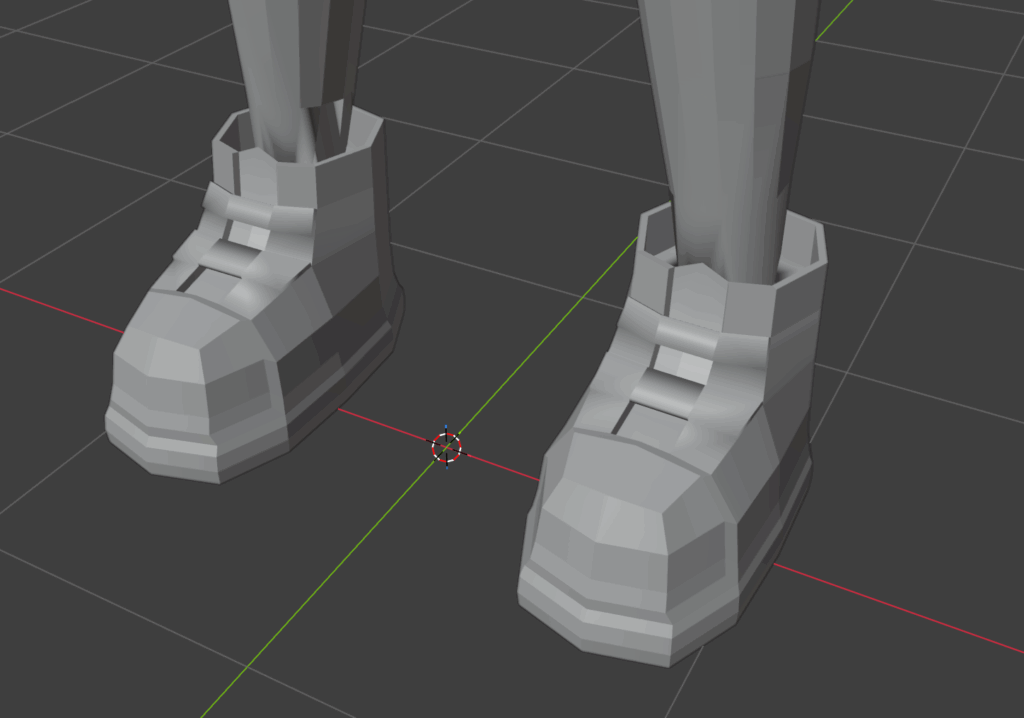

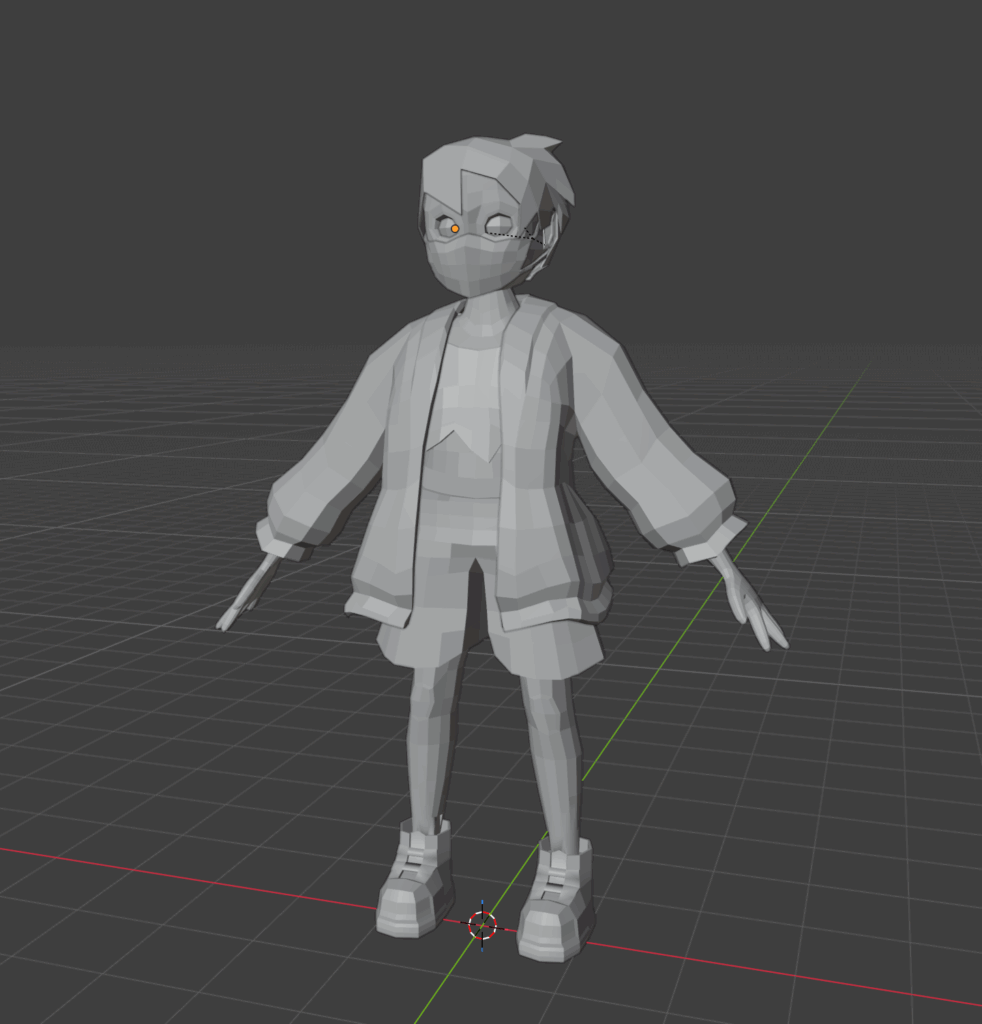
By Thursday I had the full model, and I was going to spend the rest of the week UV cutting and texturing. However, this was interrupted by the Global Game Jam. While fun and definitely worthwhile, it did cut into my development timeline.
In between cleaning up for the Global Game Jam’s deadline, I also finished up some miscellaneous parts of the owner model that I hadn’t gotten around to yet. I finished the hair properly, sewed together the meshes, and UV cut, before added it to the Unity scene to see how it’d look. There were a few minor issues (like the jacket clipping through the body), but overall it looked good — and better once it was textured.
RIGGING:
I put textures aside for the time being because I was acutely aware of taking too much time on things. I was anxious to move onto animations because I knew between that and programming, it would take up a lot of time, and would probably spill over as it was. Josh hadn’t finished making the rig yet, and had only UV cut the dog, so I decided to swap jobs with him — if he textured and then rigged the human model, I’d rig the dog.
My first attempt, using Blender’s rigifiy tool, went unsuccessfully. Initially I thought I’d need to join all the parented objects (which I’d separated because of the aforementioned fur shader), but turns out I’d just missed a step in the tutorial I was using.
Unfortunately, because the meshes were separated out, it did mean that the body often deformed strangely, leaving huge gaps in skin — this happened particularly around the facial area, where the meshes were separated most. This meant I had to be very careful when animating the head, lest I leave too large a gap. Additionally the front legs would deform unnaturally as opposed to the back legs, and were a job in themselves to animate properly. On the other hand, once exported into Unity and given a fur shader, some of the more questionable animation deforms could be covered up.
ANIMATIONS
This is the part of the project I know I handled the most incorrectly. I was an inexperienced 3D animator, having only done a few basic animations in Maya (3 years ago at this point). I also had no idea about the pipeline of animations to game movement. This gap in my knowledge nearly cost me the entire game.
My original plan had me import the animations one by one and implemented in order of priority. This way, I could get the most important movement mechanics done ASAP, and anything that ran overtime I could make up for by scrapping a less important animation. However, I didn’t realise that animations wouldn’t export separately. I had to get the whole mesh in, with all animations, at the same time. This realisation delayed work by about a week.
Another key mistake I made was how Blender saves its animations. For a couple weeks I kept having to re-animate work I’d already completed, simply because I didn’t know that you had to manually save every animation, rather than saving the whole file. It was immensely frustrating, as I had no idea how I was losing hours and hours of work. Because I used multiple computers, jumping between my laptop and various machines in the computer labs, I thought it was an export issue, and it was another full week before I caught on to what was actually causing the problem.
WALK ANIMATION:
Walking was highest priority, and also one of the ones that took the longest, because I wanted to make it look just right. Initially I used this video as a reference to help me.
However, it was only on finishing it that I realised it didn’t look… right. It was Marie who pointed out the issue — both sides of the dog’s legs would lift at the same time; front left paw and back left paw. Typically, when the front left paw is raised, so is the back right paw. So I had to scrap that day’s worth of work.
My next reference from “The Animator’s Survival Kit” was much more helpful. It was using this I managed to get through the full walk cycle properly. By this time I was used to the flaws in my weird rig, and could animate much faster.

WALK IMPLEMENTATION
Once animated, I immediately imported into Unity, to discover my movement code would need updating. The dog had a proclivity to walking backwards, didn’t like to walk on the X axis, and rotation translations wouldn’t follow to the new camera angles. But the weirdest bug of all, was the one where the dog would just… float away.
A lot of the fixes were very simple, however:
- Walk backwards
- Had to checked “bake axis rotation”
- X axis and rotation translations
- New code
- Floating away
- More mass added to the rigidbody
(code)
BITE ANIMATION:
My bite animation was one of the most tricky. It wasn’t a long animation, and it shouldn’t have been particularly difficult, however I’d made it so by having the head detached from the body via the collar. Finding a way to animate without moving the head too much was a bit of a job, and it wasn’t perfect, but the worst of the crime would be covered up by the fur shader.
DRAG ANIMATION:
For my drag animation, I needed to split it in two: one to lower the head, and the other to pull. This way, “latching on” and “pulling” were two separate animation states, and be easier to code. Lowering the head was easy; I duplicated the bite and deleted the part where the dog raised its head again. Then all I had to do was tilt the head forwards a little and get the paws into a walking position.
Animating the front paws was the most horrendous experience. There was almost no way to make it look natural and nice. The shoulders kept clipping into the body. There just wasn’t enough room for my usual tricks to work when the front legs were acting wonky. I managed to achieve it in the end, but that was a long road.
IDLE ANIMATION:
In comparison, the idle animation was easy. The dog would just gently rise up and down, and pant a little bit.
JUMP ANIMATION:
The jump was another tricky one, but I had a surprising amount of fun with it. I used the video below as a reference, downloading it and lowered the speed (because for whatever reason, Youtube Shorts doesn’t allow you to change video speed like a regular video). I realised, most of the animation wasn’t the jump itself – it was the lead up and ending.
It took a lot of work trying to find the optimal amount of time for the dog to crouch down, and then jump. Too much time and the player would be frustrated; not enough and it looked like the dog had no weight. And again, the same issue arose in the end of the jump, as the dog “rights” itself. I managed to find the right balance in the end though.
SCRAPPED ANIMATIONS:
RUN ANIMATION:
(scrapped because I forgot to put it in the file where I was exporting to Unity. By the time I realised the mistake, I’d already done all the animations, and didn’t exactly have the time to do it all again.)
BITE HIGH ANIMATION:
(Scrapped as I couldn’t find an efficiant way to program a function in which the dog recognises objects above, below, and across from it.)
BITE ACROSS ANIMATION:
(Scrapped as I couldn’t find an efficiant way to program a function in which the dog recognises objects above, below, and across from it.)
JUMP DOWN ANIMATION:
(Scrapped as I felt like it would be annoying to players to wait for an animation, rather than just being able to walk off the edge.)
PLAYTEST NOTES
Unfortunately due to sickness, I wasn’t able to go to the Valentines Day exhibition, where it would have been a good opportunity to playtest the game. During this phase of development I wanted to workshop puzzle ideas and level design layouts with Josh while implementing mechanics, so we could design within scope. However, Josh had been very absent, and I had been designing by myself, so I wanted to see how people generally reacted to the design.
Fortunately, my classmates and tutors stepped up to help a few days after. At this time, the scene was a 3 room structure in an L shape, wherein the starting camera had its back to the second room to “hide” it until the player discovered the camera-change button, which was bound to the “X” and “C” keys.
- Adam
- Suggested having an L shaped corridor to clue players into the room switching mechanic as a tutorial. Reckoned players would press the spacebar over any other key.
- Esi
- Found the X and C inputs, but also admitted she tried it only because she overheard me talking about the mechanic, and because she played Undertale/Deltarune. Likes the fisheye lenses that I planned to fix, so maybe I should keep them.
- Xane
- Could not find the button inputs at all, even when mashing every single button on the keyboard. Assumed it was spacebar, then got confused when spacebar no longer worked and thought it broke. Also managed to break the colliders???
- Jordan
- Could not find the button inputs at all. Tried WASD, then space bar, then clicked the mouse buttons, then the arrow keys. Suggests ditching the idea of a “tutorial room” for a “moment of discovery” pathway, which was originally intended. Also suggested building the discovery into part of one of the fetch quests, perhaps as part of set decor or even a UI popup.
REFLECTION
It was clear some thinking needed to be done about how I was going to approach this project, both from a design perspective and an efficiency perspective. No one managed to find the right keys, leading to a frustrating experience where they couldn’t find out what to do. While I really wanted emergent gameplay — an, “Aha!” moment where they realise the arrow keys toggle cameras — I also had to be practical as to not turn people away from my game.
Also, it had been five weeks now, and I’d only just imported the animations, with only one properly implemented. Josh was also having problems rigging the child character, and hadn’t yet finished that and moved onto 3D modelling the house. I decided to re-evaluate my priorities and come up with a new timeline, this one more realistic to the deadline.
Leave a Reply