Devotion Curator: Developing into a concept
Game was inspired from a comment I received from my previous presentation: “could play as an idol trying to hide from or avoid fans“
Games similar to this concept: Dollmare, That’s Not My Neighbour.
Activity: Inspect gifts given to you using a variety of tools. Each tool has a different purpose, but they will have a cool down if overused.
Reward: Your company sends you emails the following day summarising your performance.
Opportunity: Mid game, the player will be given gifts that’re harder to inspect. Offers a new level of difficulty.
In terms of game loops, it doesn’t look that appealing. However, games such as “That’s Not my Neighbour”, the repetitiveness and increase of difficulty is what makes it so fun. For this reason, I believe it’ll make a great game loop:
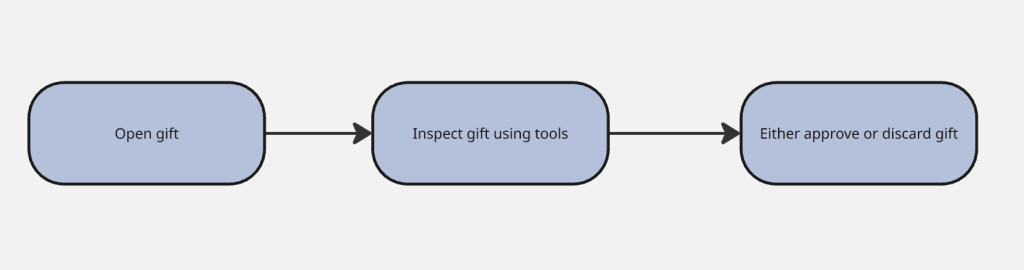
Prototyping process:
I chose to do a Unity prototype, although it’s a software with a steep learning curb, it offers a lot of tutorials online. I struggled a lot with the creation of the prototype, but I had a very good support tech to help me (Ross :3)
Purpose of this prototype: Show the mechanics and show how one of the tools interact with the gift.
The first thing I did was to draw very basic outlines of my prototype art. This didn’t have to be hard or overcomplicated, I went on Procreate and quickly drew some assets that will be used for this prototype.
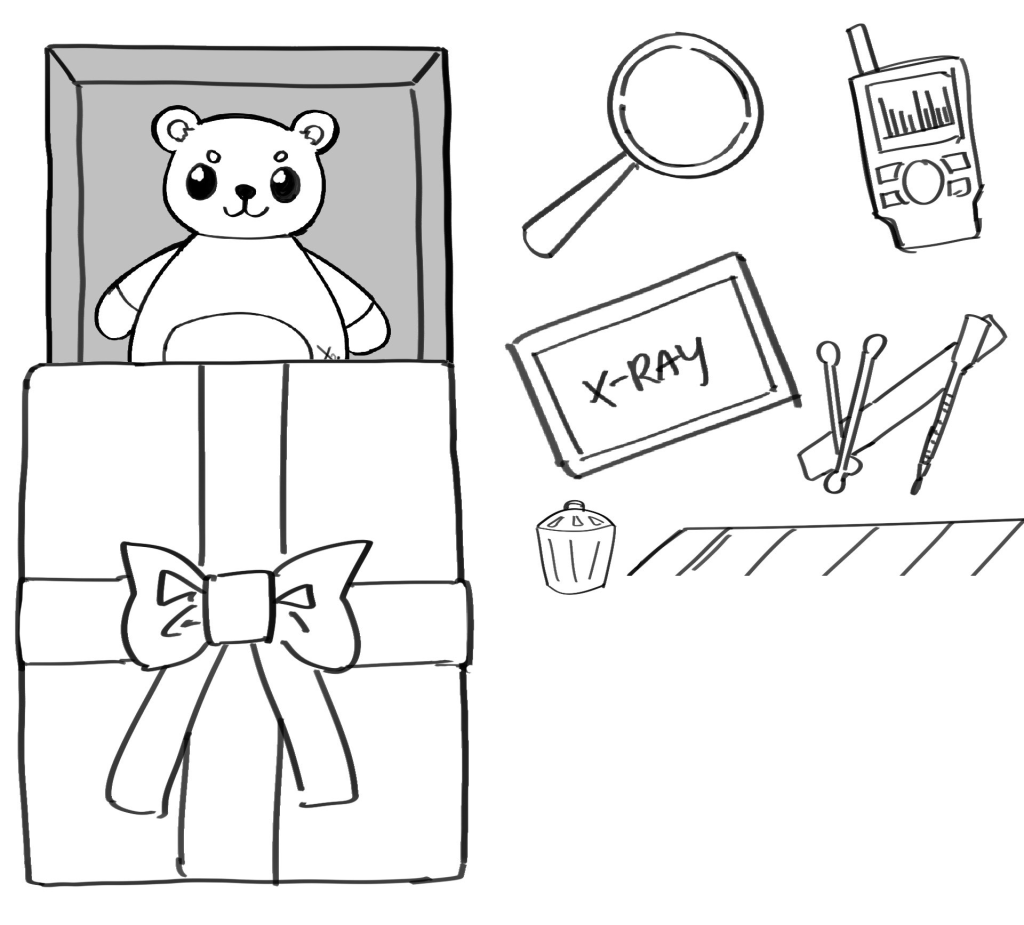
All of these objects are separate , on different layers- this makes it easier for me to import into the scene as assets and move around.
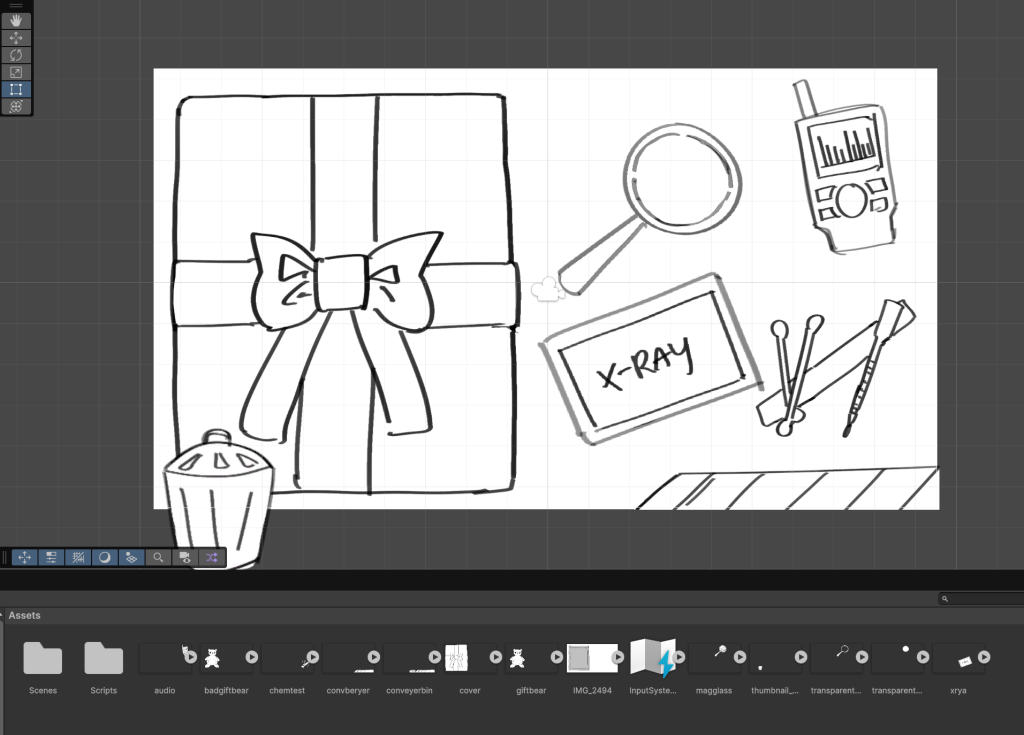
Once I had imported the assets, I worked on the point and click script, which only really needed to be applied to 3 objects: the magnifying glass, the gift box and the teddy bear on the inside.
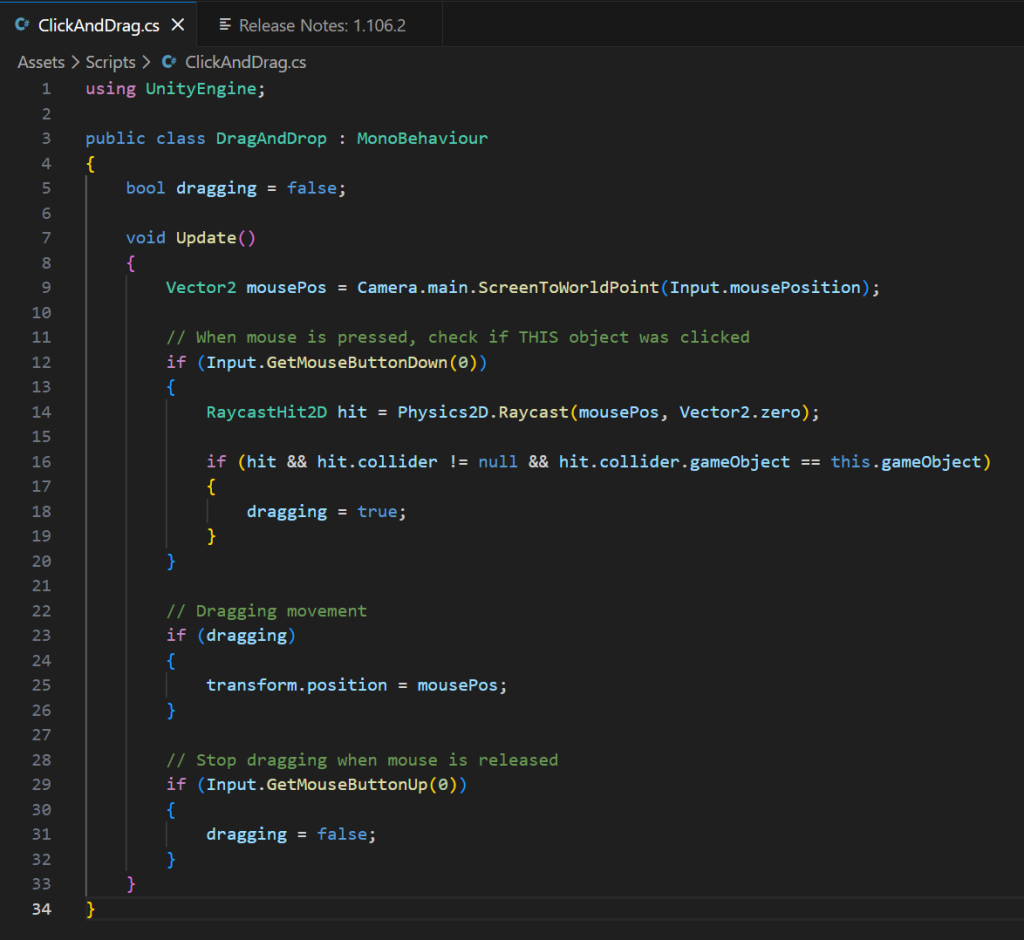
Once I had imported the assets, I worked on the point and click script, which only really needed to be applied to 3 objects: the magnifying glass, the gift box and the teddy bear on the inside.
I used this tutorial to help me out: https://discussions.unity.com/t/implement-a-drag-and-drop-script-with-c/472635
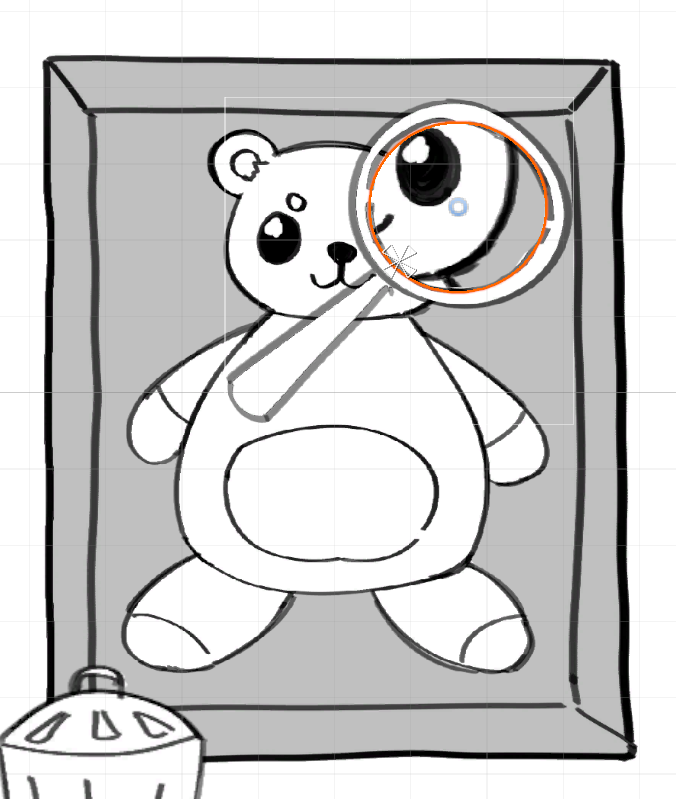
Once that was done, I asked Ross to help me with the magnifying glass. With this asset, I wanted the magnifying glass to zoom into the gift and it should look bigger. If it’s a bad gift, there should be some stitch marks (specifically for the plushies) as it implies that someone has tried to stuff something bad in there.
I looked at this video, but Ross did most of the implementation.
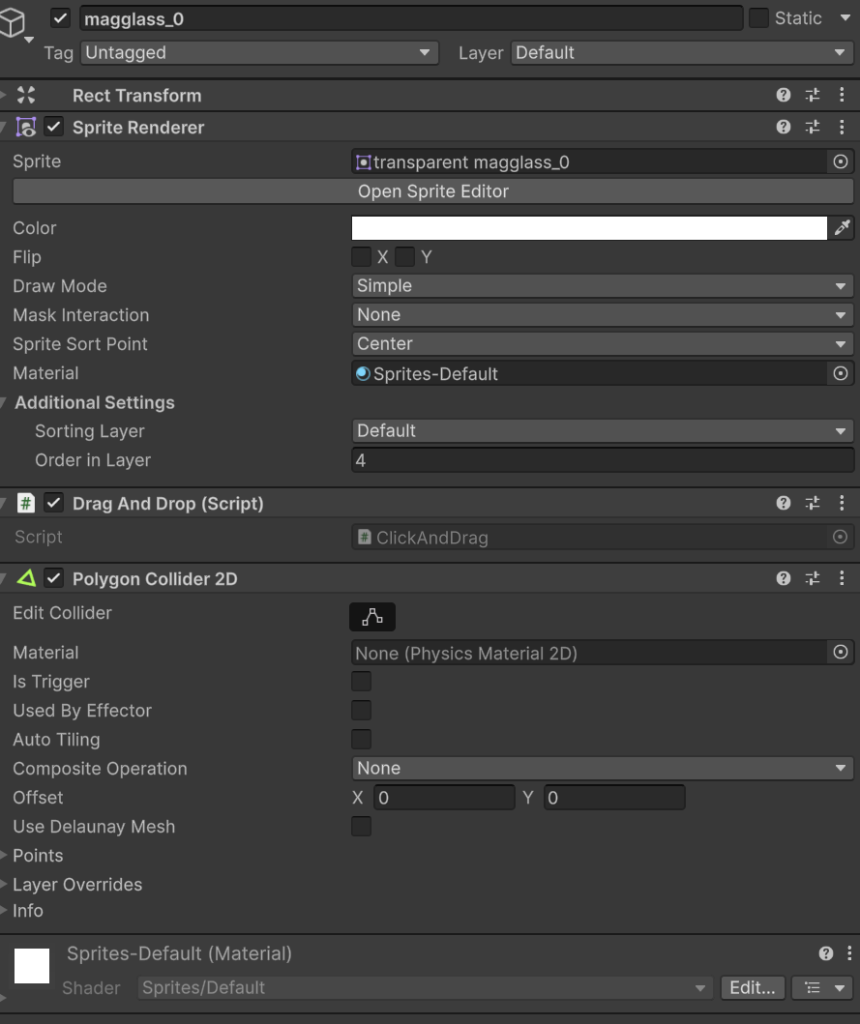
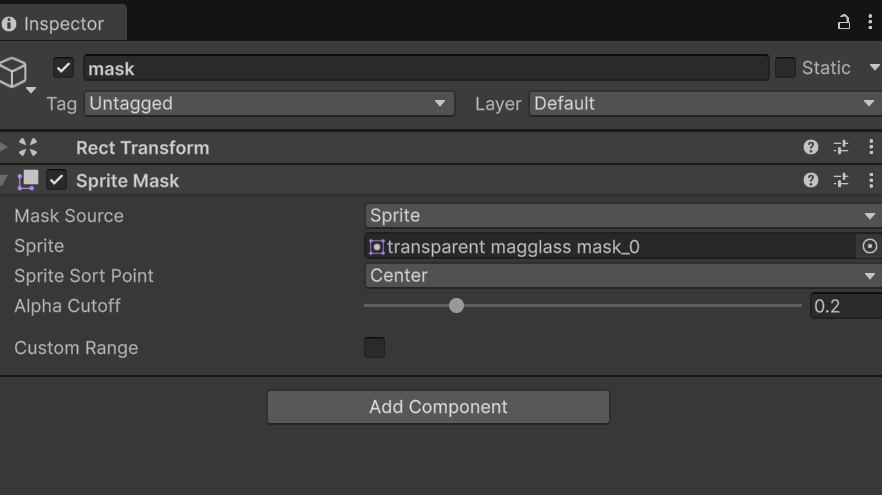
I tried to pay close attention, even though I didn’t know much of what was going on. But after reviewing this video, it looked like he was applying a mask to the glass of the magnifier, duplicated the plushie and made it bigger. He then made the bigger plushie only visible inside of the mask, making it only visible when the magnifier is directly above it:
I wanted to try scripting by myself and understand the layout of Unity. So, I decided to script something easy and digestible for me. That for me was a click to fall script, which would be applied to the cover of the gift box.
First thing I did was to apply the the click and drag script to the asset and began to script the click to fall.
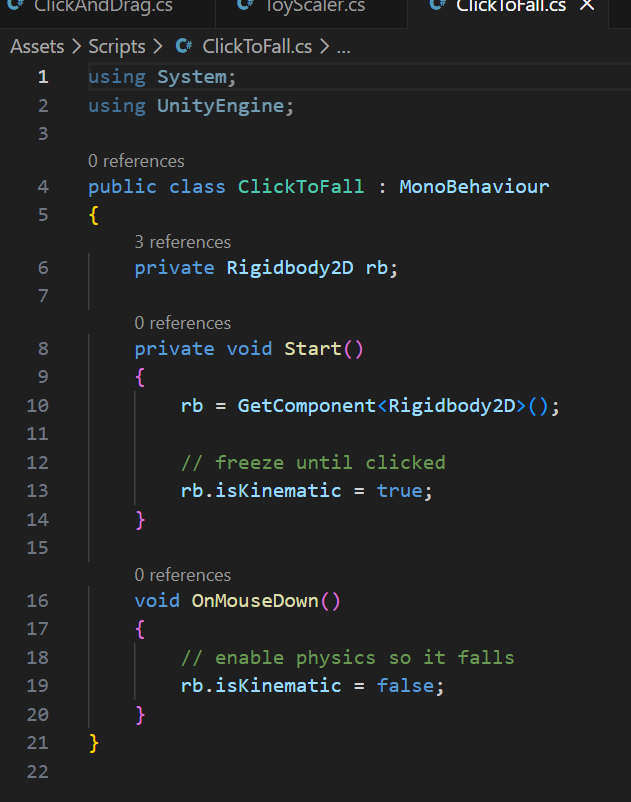
Quite a small task, but I’m glad it worked in the end!
For the last scripts which involved the use of the conveyer belt for approval and the bin for disposal, I asked Ejay to help me in his free time.
Script for Conveyer belt:
This script detects when the plushie “touches” the conveyer belt. Once it touched the conveyer belt, it starts a coroutine, which makes the plushie slide to the right side of the screen.
Once it’s gone from the screen, it disposes the object.
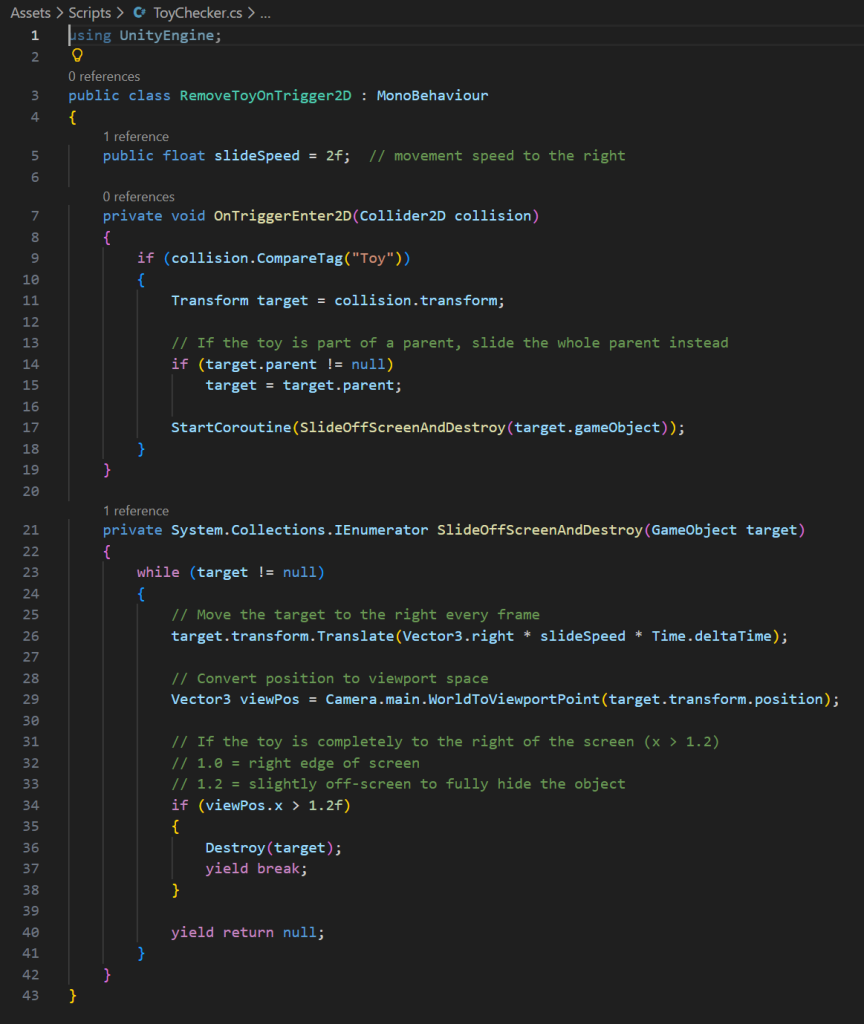

Script for bin:
This script detects when the plushie touches the bin outline. It checks if the plushie is tagged with “toy” then it destroys the object.
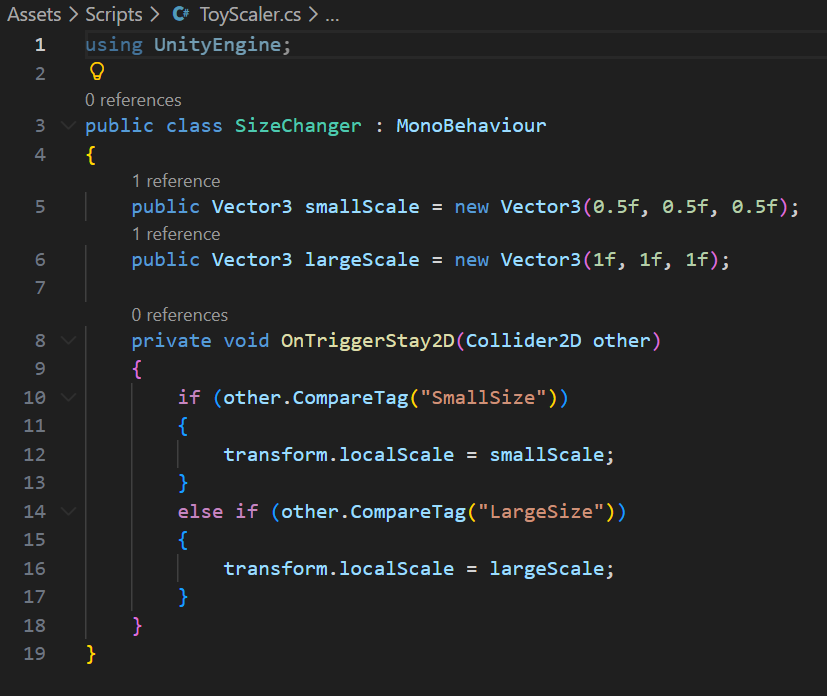
He also kindly scripted a script involving the plushie, so when it moves to the right side of the screen, it becomes smaller, fitting onto the conveyer belt.
Script for toy scaler:
In this script, it detects if the object is inside a 2D trigger. The “area” that the plushie touches or is inside of, makes the plush shrink in size. But if plush is outside of the area, it becomes bigger.
Prototype video:
I was really happy with the outcome! It’s simple, but it shows the concept of the game without much visual input. I also added some factory noises as I thought it was fitting for the atmosphere.
Concept art:
For the concept art, I wanted to show something fairly simple. I drew the outline of a plushie and coloured it in lightly- trying to avoid “harsh” shading.
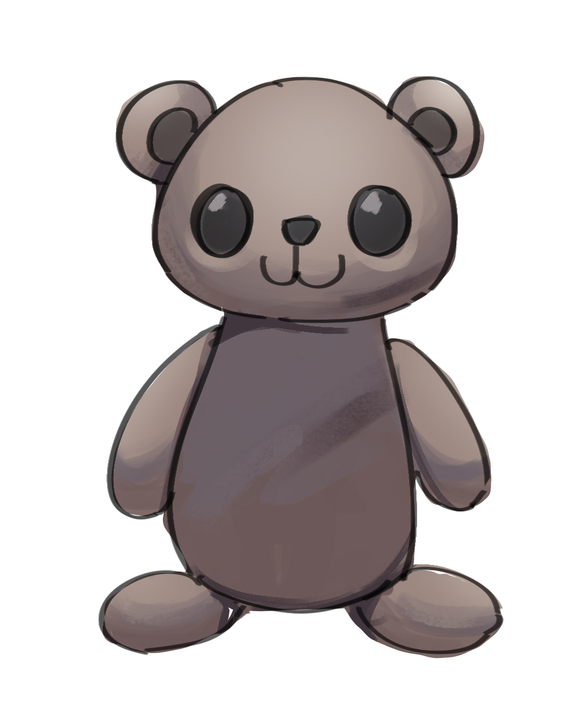
For the direction of the concept art, I was heavily inspired by games such as How Are Fish Made and Buckshot Roulette.
These games are 3D but it the textures are pixelated, making it look low quality- which is something that has drawn me to the art style a lot.
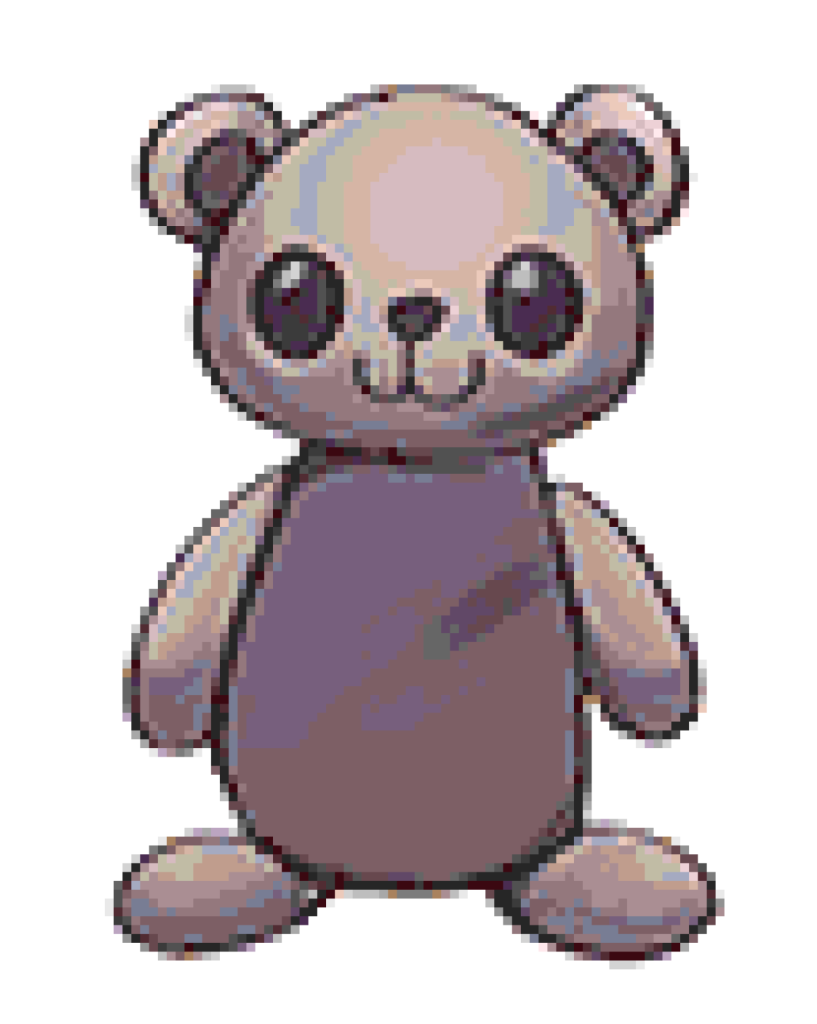
For this concept, I looked at a tutorial on how dithering works and played around with posterization to make the colours look more chaotic.
I used this tutorial on how dithering works.
Finished concept:
Thoughts and takeaways
For this concept, I wish that I hadn’t made the shading too light. I think that the dithering would’ve looked better if the contrast was greater. However, the posterization and playing around with different areas of the plush’s colours made it look the way I had intended.
Leave a Reply