In my summer plan, I wanted to organise my evidence better and explain why I changed a design.
I usually find it easier to revise work once someone points out a problem. I have not always recorded the reason for a change, so I want to keep that beside the work.
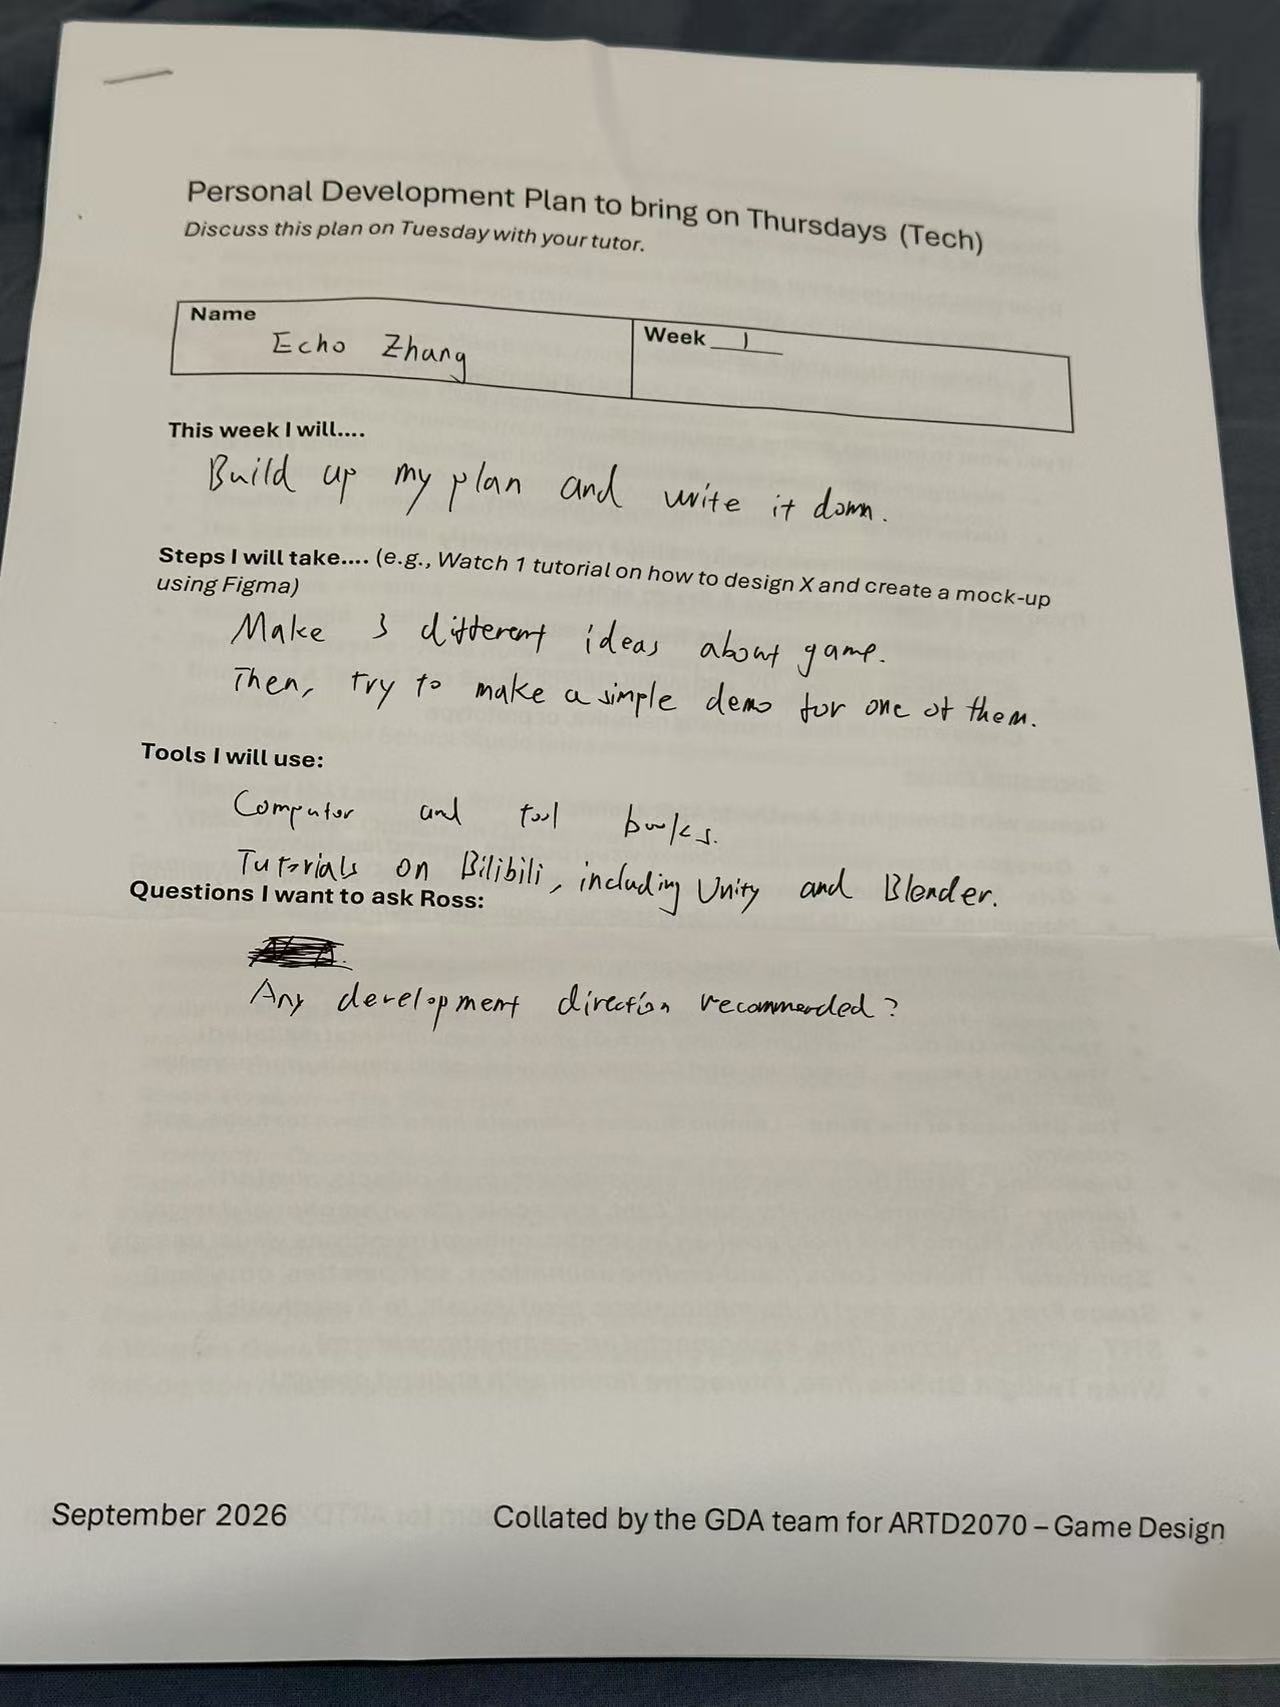
My aim was to develop a plan and write it down. I planned to come up with three different game ideas, then try a simple demo for one of them.
I listed my computer and Bilibili tutorials for Unity and Blender as tools and resources. My question for Ross was which development direction he would recommend.
The sheet records what I intended to do at the start. I’ve recorded the ideas and prototypes as weekly documents.
My original Week 1 plan.
What I want to improve
Evidence: keep sketches, screenshots and feedback beside the decision they helped me make. Before a deadline, map the work to the current module outcomes.
Research: explain which part of a reference I used, how I adapted it and what happened in my prototype.
Planning: set a small aim before a practical session, save what I made and write down the next action. Bring questions to a tutor while there is still time to act on the answer.
Development across weeks 1–6
Week 1: I used emotion maps and playable situations to generate three ideas. The peer comments showed that naming an influence did not explain what made my own idea interesting.
Tools: paper, sticky notes, PowerPoint and Nodenoggin. I needed to explain the player’s goal and main actions more clearly.
Week 2: I wrote the FPS design intention and compared it with the peer comments. I needed a clearer world and a reason to choose this game over another shooter.
I wanted to work out how movement and upgrades would make the player feel powerful.
Week 3: I developed the FPS prototype in Unity and C#. The feedback asked for a clearer hook and two more prototypes. Prism Relay explored painted routes; Beat Foundry explored timing rewards.
I used Nintendo’s Splatoon guidance and the Hi-Fi RUSH developer discussion to connect reference research to rules I could build.
Week 4: I made a direction board for the world, tone and visual style. Writing the loop and pillars helped me decide which features belonged in Rift Runner.
I needed to show those aims in an encounter someone could play.
Week 5: Mason, Alice, Shirley and Maggie tried the game. Their comments showed problems with instructions, opening difficulty, rewards and finding the next area.
I used their comments to prioritise teaching and readability before adding more content.
Week 6: I reviewed nine pitch evaluations and revised the PowerPoint presentation. I used gameplay examples to explain the rhythm rules and recorded how the playtest comments affected later changes.
The lower score for gameplay supporting the pillars reminded me to show an action and its result in the pitch.
Tools and learning resources
Unity and C#: building scenes, movement, combat and HUD behaviour.
WordPress and Nodenoggin: keeping feedback and development records together.
I watched the following 6 tutorials. They cover movement, combat feedback and rhythm, with notes below on how each topic relates to my prototypes.
First-person movement and shooting
自学 Unity 游戏开发:最简单第一人称射击游戏 (李文昊). The FPS section covers movement, mouse rotation, jumping and bullets. Later lessons cover muzzle effects, firing frequency and enemy states. These are useful topics for reviewing the opening fight in Rift Runner.
I would focus on the shooting-frequency and enemy-state lessons when looking at Alice’s feedback about enemies attacking too often. I need to understand which values control the pressure in an encounter.
斜坡移动、冲刺和蹲伏 (Dave / GameDevelopment, Bilibili mirror by 勿杉). This covers slope movement, sprinting and crouching. It gives me a reference for movement across the raised paths in my arenas.
I would compare how the controller handles slopes and changes between movement states. The aim is to keep movement predictable while the player is also aiming and listening for the beat.
HUD and hit feedback
横版卷轴射击游戏 Ep.12:角色血条 (阿严Dev). This lesson covers player and enemy health bars, including a HUD health display. The example is a 2D shooter, but the connection between health values and the display is relevant to my FPS.
This relates to the Week 5 comments about scattered information. I would use it to review how health changes are communicated, while keeping my own HUD layout.
制作一个简单的命中特效:Unity 粒子系统入门 (阿严Dev). The lesson introduces a simple hit effect using particles. This is relevant to Alice’s request for clearer hit feedback.
I want an effect that helps the player recognise a hit without covering the target or beat guide. I would start with a small effect and compare it with the feedback already on screen.
Rhythm and repeated effects
Unity 2021:Unity 自带对象池 (阿严Dev). This covers the built-in ObjectPool API and a reusable pool through a gem-spawning example. It is relevant to repeatedly spawning bullets and short-lived effects in my prototypes.
I would look at how objects are returned to the pool and reset before reuse.
从零开始:音游篇 第一期 (月の舞裔). This is an introductory rhythm-game development record with some teaching content. It offers a smaller rhythm-game example to compare with Beat Foundry.
For my project, the useful question is how clearly a player can connect an input with a timing result. I would compare that feedback with Beat Foundry’s beat guide and Rift Runner’s on-beat rewards.
My next actions
Keep each session focused on one question, such as whether a new player understands the beat reward.
Record the feedback, the change I chose and the reason for it together.
Continue improving the opening instructions and make important rewards easier to notice.
Keep a weekly record of practical work, resources used and questions for Ross. Add session notes when they happen.
Leave time before submission to select evidence, proofread captions and organise the final files.