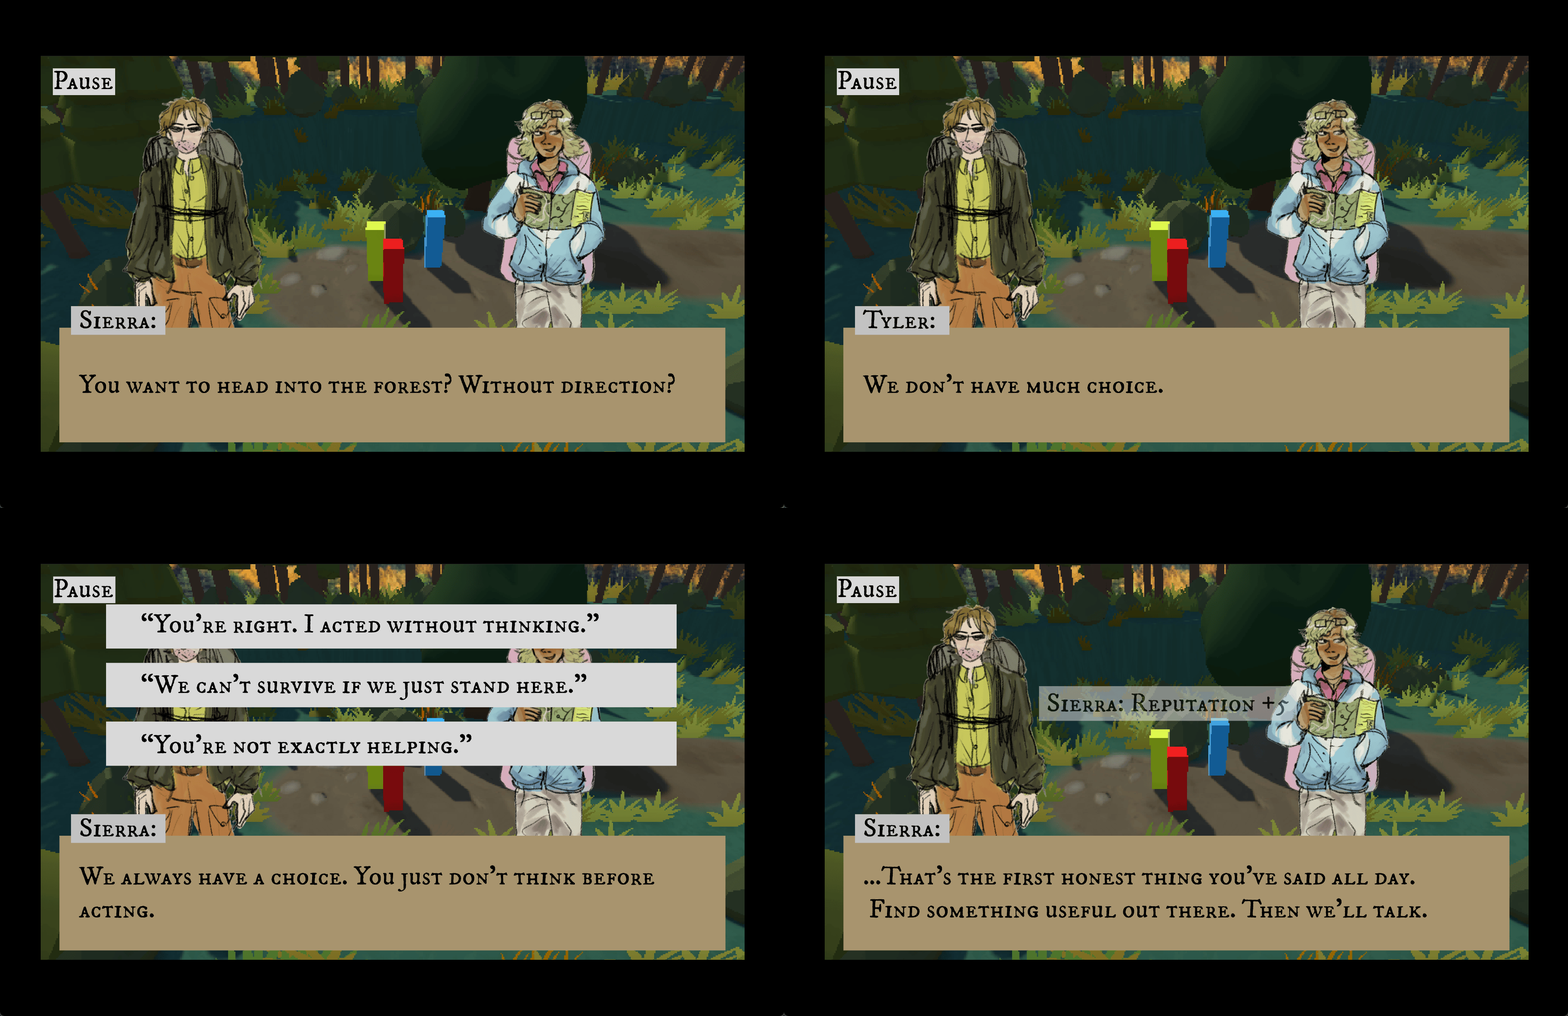
30 April Update - Dialogue System V2.0 Dev - 05
Multiple Character Portraits and Portrait Switching
Two days before the playtest, Alex told me that he had created several portrait states for the characters. Because of this, I decided to add a multiple-expression portrait system into the dialogue system, so the characters could show different emotions during conversations instead of using one static portrait.
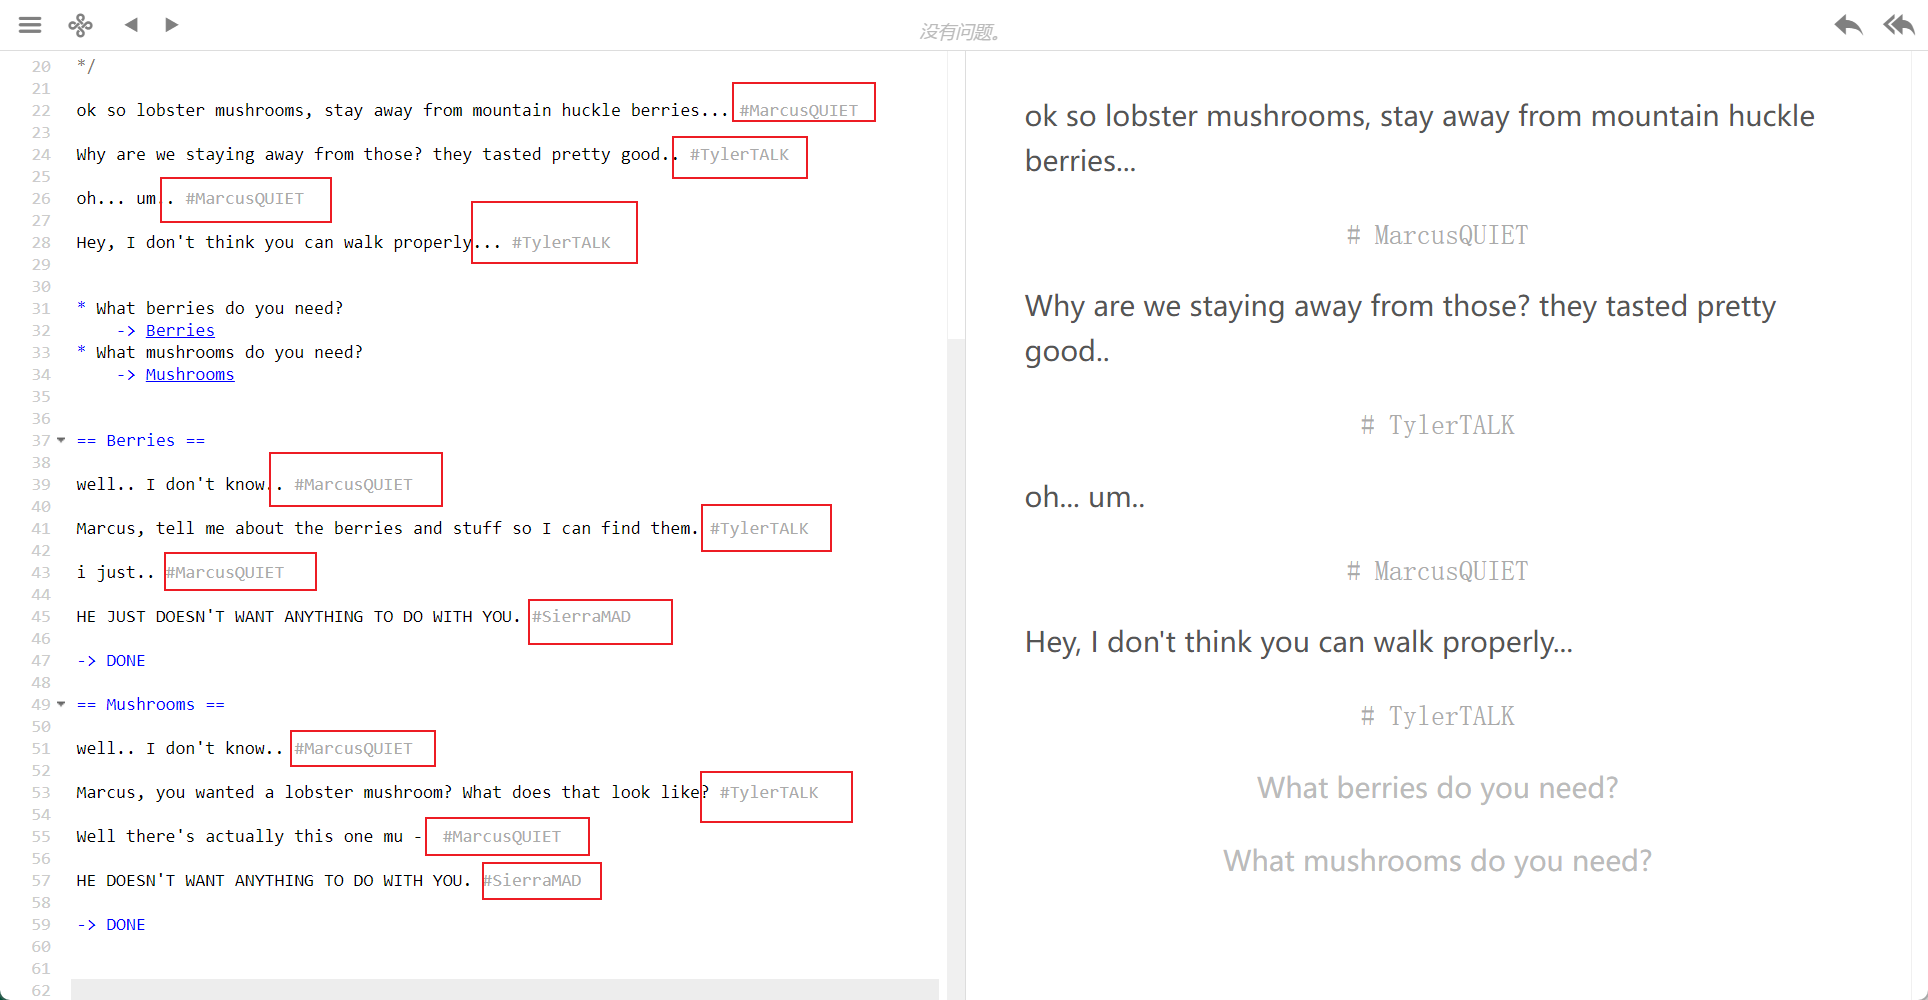
The portrait switching is mainly controlled through character tags in the Ink dialogue. Each dialogue line can include a tag to show who is speaking and which expression should be displayed, for example:
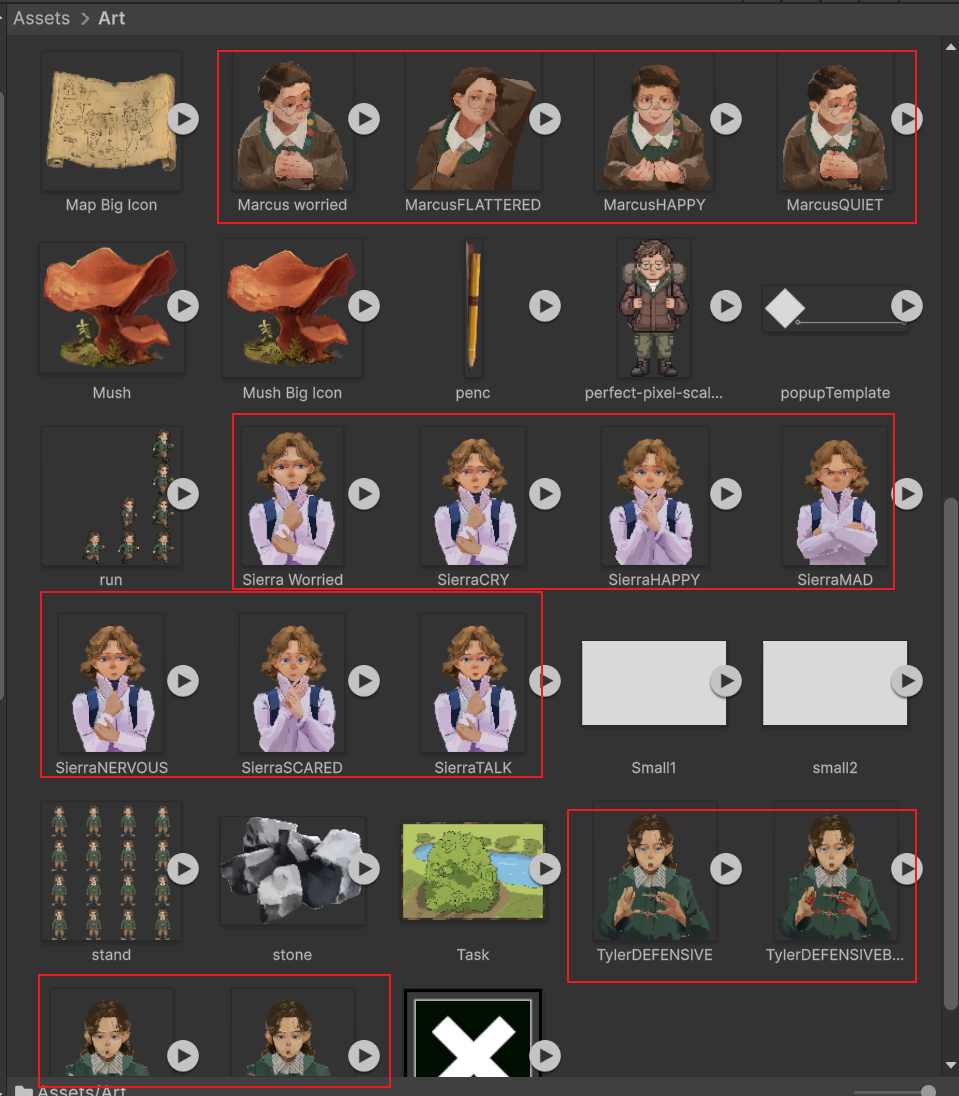
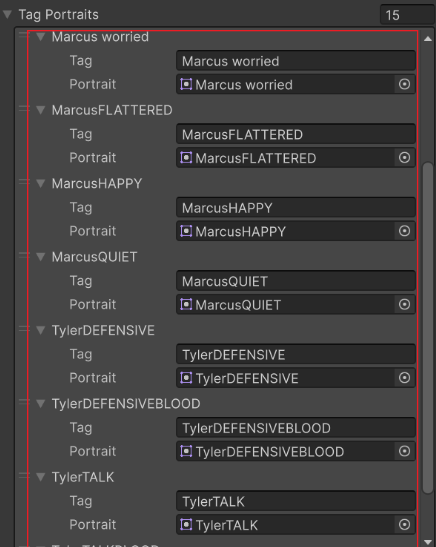
When the dialogue is running, DialogueManager.cs reads the tag from the current dialogue line. The system then compares this tag with the portrait list configured in the Dialogue Manager. For example, if the tag is MarcusQUIET, the system displays Marcus’s quiet portrait. If the tag is SierraMAD, the left-side NPC portrait area switches to Sierra’s angry portrait.
=====================================================================
17 April Update - Dialogue System V2.0 Dev - 04
Item-Based Dialogue Trigger
Later dialogue also needs to respond to the player’s inventory. Some dialogue branches should only appear when the player already has a specific item. If the required item is not in the inventory, the NPC will only play the default dialogue.
This is mainly handled in DialogueManager.cs. When a dialogue starts, the function PushEngineStateIntoStory() checks the current inventory and sends the result into Ink variables.
					void PushEngineStateIntoStory(Story s)
{
    var inv = InventorySystem.Instance;

    TrySetInkVar(s, "map", inv != null && inv.Has("Map") ? 1 : 0);
    TrySetInkVar(s, "mushroom", inv != null && inv.Has("Mushroom") ? 1 : 0);
    TrySetInkVar(s, "compass", inv != null && inv.Has("Compass") ? 1 : 0);
}
For example, if the player has a Map, the Ink variable map will be set to 1. If the player does not have it, the value will be 0.
The Ink dialogue can then use these variables to decide which dialogue branch should play. This allows the dialogue system to react to the player’s progress instead of always showing the same response.
=====================================================================
14 April Update - Dialogue System V2.0 Dev - 03
First Talk Dialogue
After the forced opening dialogue ends, the player can move freely and start exploring the scene. However, to help the player understand the identities, attitudes, and story background of the two NPCs, we designed a First Talk Dialogue for each NPC.
This dialogue only plays once. When the player talks to an NPC for the first time, the system plays the special first-time dialogue. After it has been played, the system saves this state. From then on, talking to the same NPC again will trigger the normal default dialogue instead.
					TextAsset GetDialogueToPlay()
{
    if (firstTimeInkJSON == null) return inkJSON;
    if (HasPlayedFirstTalk()) return inkJSON;
    return firstTimeInkJSON;
}
=====================================================================
11 April Update - Dialogue System V2.0 Dev - 02
Forced Opening Dialogue
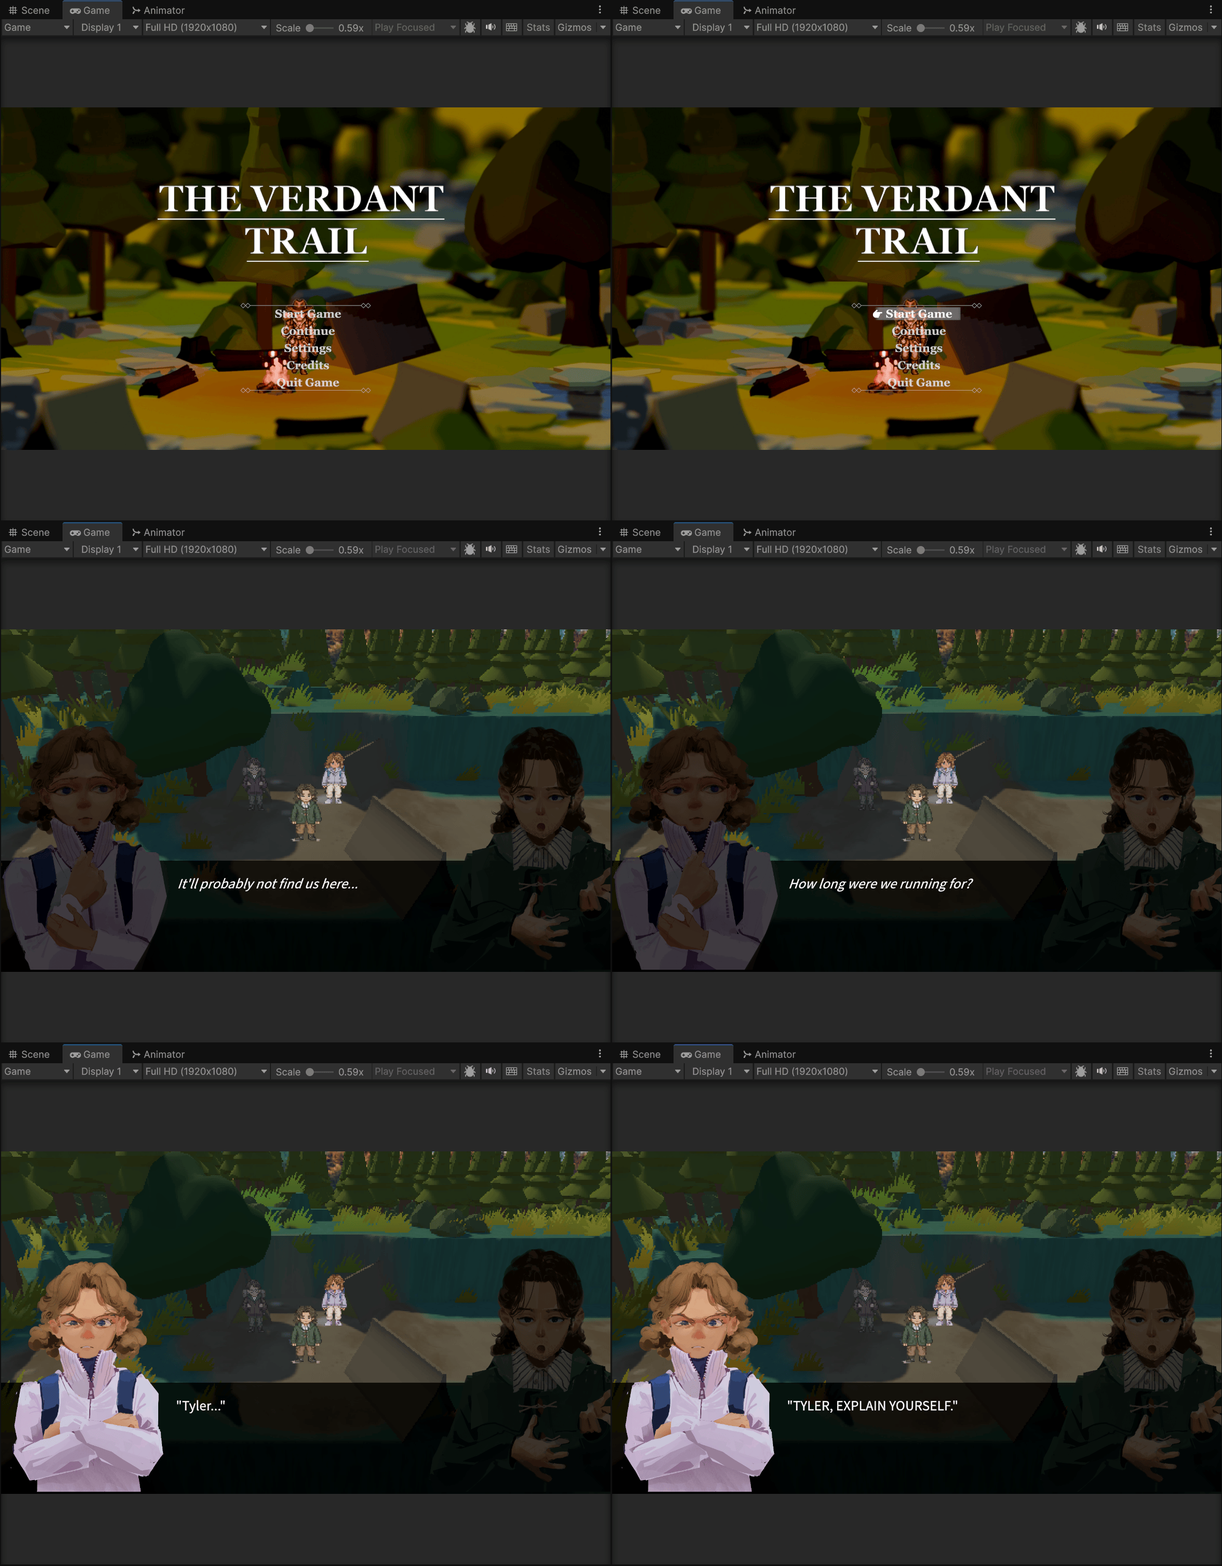
When the game starts, the script automatically calls the opening dialogue instead of waiting for the player to press E. It checks whether the forced dialogue Ink file has been assigned, then uses DialogueManager.Instance.StartForcedDialogue() to open the Dialogue Panel and play the opening story.
					DialogueManager.Instance.StartForcedDialogue(
    forcedDialogueInkJSON,
    forcedDialoguePortrait,
    allowEscToSkipForcedDialogue,
    OnForcedDialogueClosed
);
During this forced dialogue, normal player interaction is locked. The script sets OpeningLock.IsLocked = true, which prevents the player from triggering other interactions while the opening story is playing.
OpeningLock.IsLocked = true;
After the forced dialogue is finished, OnForcedDialogueClosed() is called. This unlocks the player’s normal input and allows the player to start exploring and interacting with NPCs.
					void OnForcedDialogueClosed()
{
    OpeningLock.IsLocked = false;
}
Inventory Unlocked Notice
During the playtest, some players said they were not sure how to open the backpack system. Although the inventory function already existed, without a clear prompt, players might not immediately realise that they could press B to check their items.
Because of this, I later created a backpack icon to continuously show the backpack position and its shortcut key in the UI. This part has already been explained in Inventory & Reputation & Task System.
In addition, since the game starts with a forced dialogue sequence, the player cannot freely control the character at the beginning. I wanted to make the backpack guidance clearer after this dialogue ended. When the forced dialogue finishes and the player regains control, the system displays a notice: Backpack system unlocked. Press B to view.
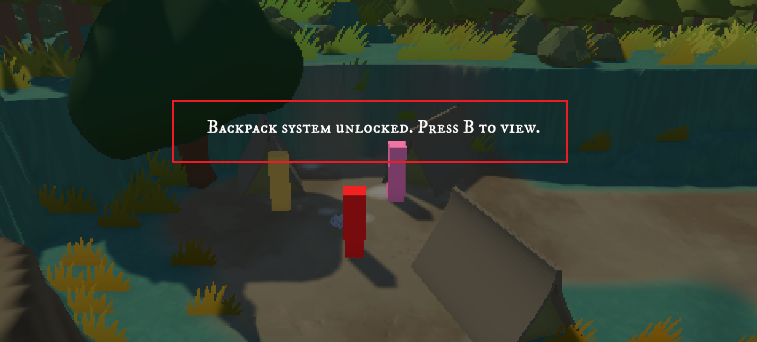
When the forced dialogue finishes, the system calls OnForcedDialogueClosed(). This function unlocks the player, shows the bag icon, and plays the notice prompt.
					void OnForcedDialogueClosed()
{
    OpeningLock.IsLocked = false;
    SetBagVisible(true);
    PlayNoticeAfterDialogue();
}
SetBagVisible(true) makes the backpack icon appear in the bottom-left corner.
Then PlayNoticeAfterDialogue() starts the notice animation coroutine.
noticeCoroutine = StartCoroutine(ShowNoticeRoutine());
Inside ShowNoticeRoutine(), the system first shows the notice:
SetNoticeVisible(true, true);
Then it uses CanvasGroup.alpha to create a pulsing fade effect.
					float curve = Mathf.Sin(progress * Mathf.PI);
noticeCanvasGroup.alpha = Mathf.Lerp(1f, minAlpha, curve);
This means the notice fades down and then returns to full visibility.
The current setup makes it pulse 3 times, with each pulse lasting 0.6 seconds, and the lowest alpha set to 0.35.
					noticePulseCount = 3;
noticePulseDuration = 0.6f;
noticeMinAlpha = 0.35f;
After the pulse animation ends, the notice is destroyed:
					Destroy(noticeRoot);
noticeRoot = null;
=====================================================================
10 April Update - Dialogue System V2.0 Dev - 01
Active Speaker Highlight
					void ApplySpeakerState(Speaker speaker)
{
    float leftBrightness = dimBrightness;
    float rightBrightness = dimBrightness;

    switch (speaker)
    {
        case Speaker.Player:
            rightBrightness = 1f;
            break;
        case Speaker.Npc:
            leftBrightness = 1f;
            break;
    }

    SetPortraitBrightness(leftPortrait, leftBrightness);
    SetPortraitBrightness(rightPortrait, rightBrightness);
}
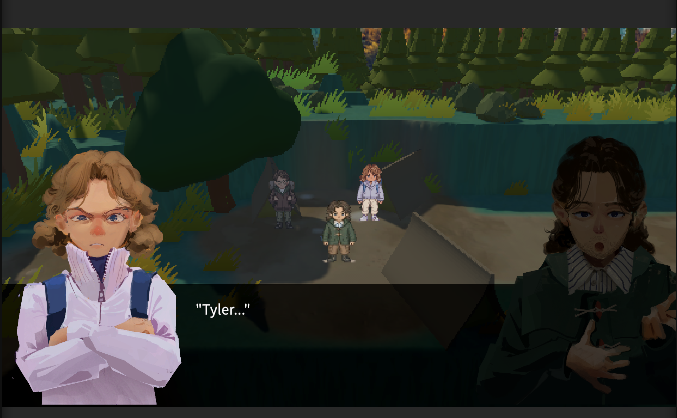
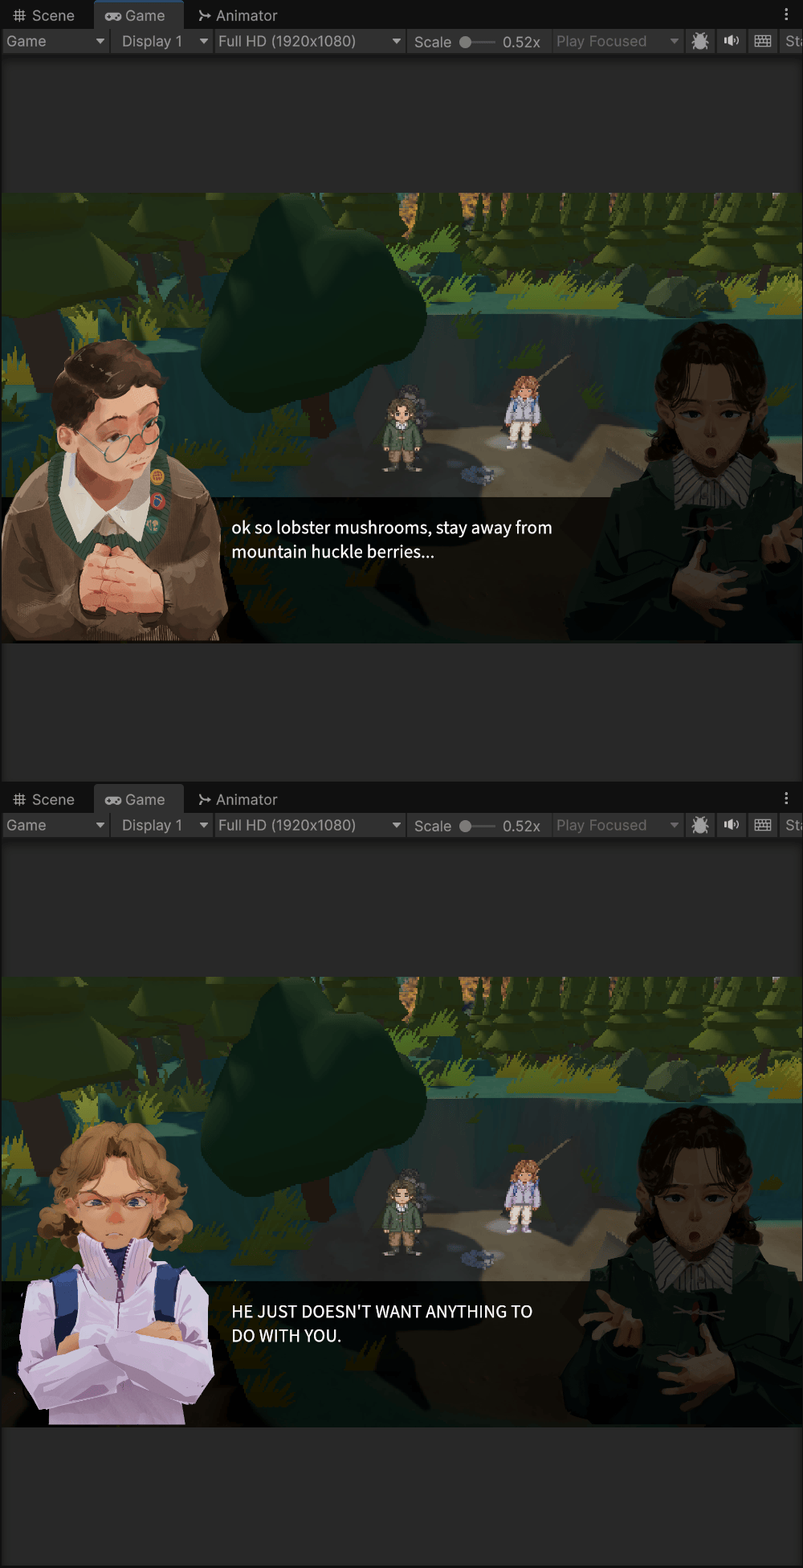
The function ApplySpeakerState() controls which portrait should be highlighted during dialogue. If the current speaker is an NPC, the NPC portrait becomes bright and Tyler’s portrait becomes dimmer. If Tyler is speaking, Tyler’s portrait becomes bright instead.
Multiple NPC Portrait Switching
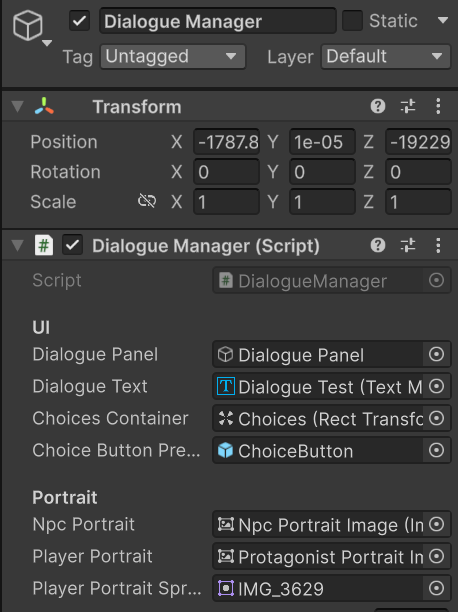
In the Canvas, the Dialogue Panel is divided into two portrait areas. The left side is used for the current NPC portrait, while the right side is fixed for the protagonist, Tyler.
After setting up the required UI references in the Dialogue Manager, I used the dialogue tag system to control which NPC portrait should appear on the left side.
					void TrySwapPortraitFromCurrentTags(Speaker speaker)
{
    string rawTag = TryGetRawTagFromCurrentTags();

    if (!string.IsNullOrEmpty(rawTag) && tagPortraits != null)
    {
        // Match the dialogue tag with the correct portrait
    }
}
This function reads the current dialogue tag and matches it with the correct portrait setup. As a result, Marcus, Sierra, or any other NPC can appear in the same left-side portrait area, as long as their name and portrait are configured in the Dialogue Manager.
This makes the dialogue UI reusable for different NPC conversations instead of creating a separate panel for each character.
=====================================================================
15 March Update - Dialogue System V2.0 Requirement Planning
After the first version of the dialogue system was completed, the basic interaction had been tested and confirmed. However, feedback from Playtesting 2 showed that the dialogue and exposition still needed major improvements.
Several players felt that the opening exposition was too long and delayed the start of the game. Some players skipped the dialogue because they wanted to begin playing sooner. The narration was also confusing for some players, as they were not sure who they were playing as, who the NPCs were, or what the main objective was. The story information was not always presented in a clear chronological order, which made the plot harder to follow.
Based on this feedback, I started planning the restructure of Dialogue System Version 2. The updated system needed to make the dialogue shorter, clearer, and easier to follow, while still supporting the story and character interactions. I listed several key requirements for the new version:
- Shorten and simplify the opening dialogue
- Add a forced opening dialogue at the beginning, but keep it brief and focused
- Make the player’s role and objective clearer through dialogue
- Improve the chronological order of story information
- Implement active speaker highlight feedback
- Support portrait switching for multiple NPCs
- Use character tags to control portraits and expressions
- Add a First Talk Dialogue system for each NPC
- Support item-based dialogue triggers
- Make important dialogue information easier to understand, such as using visual emphasis or clearer speaker presentation
A key change in Version 2 was that the dialogue system was no longer only used for storytelling. It also needed to guide the player more clearly, helping them understand who is speaking, what their current objective is, and what they should do next.
=====================================================================
25 Feb Update - Dialogue System Implementation
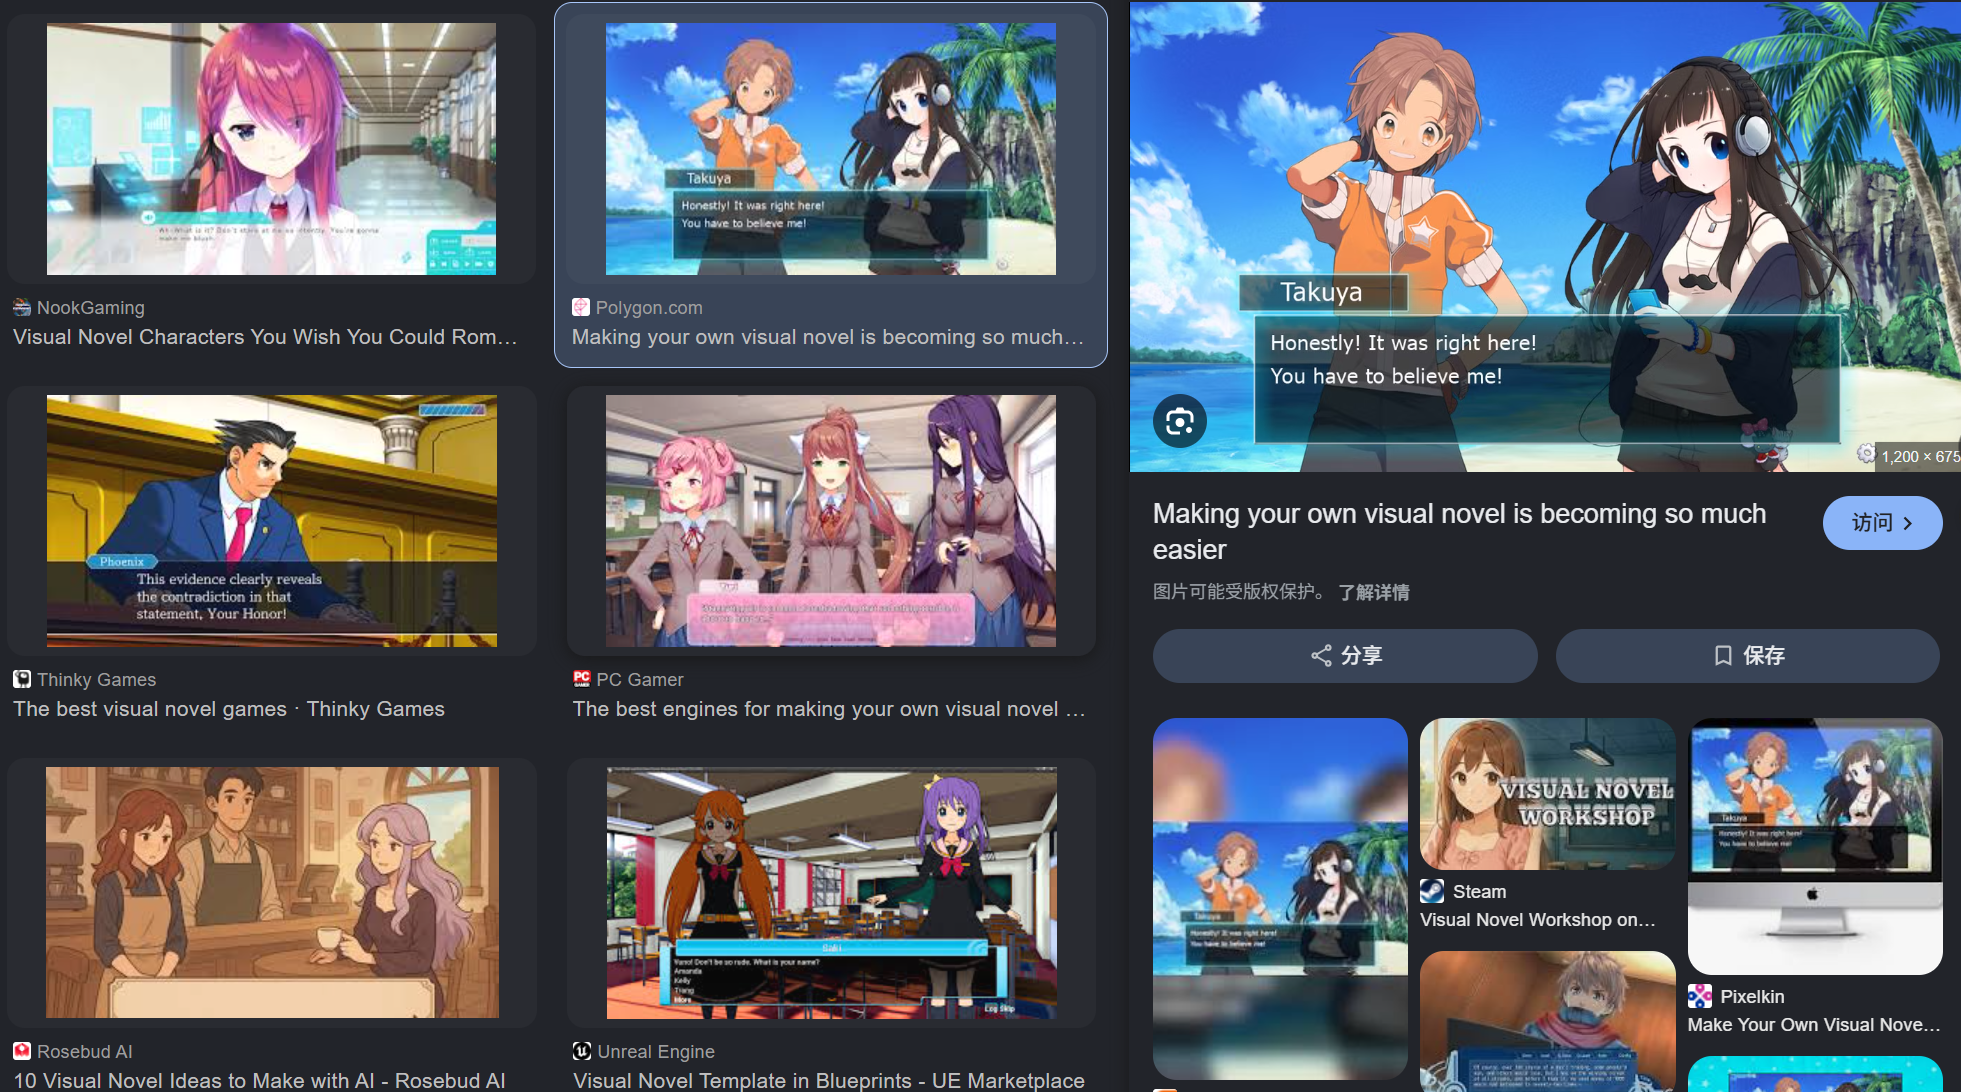
Before developing the dialogue system in Unity, I first collected references from visual novel games to study how their interaction interfaces present dialogue, character portraits, and player choices. Based on these references, I then created a simple interaction prototype in Figma. This prototype helped me plan the basic structure of the Dialogue UI, including the Dialogue Panel, dialogue text area, character portraits, and choice buttons.
The first version of the dialogue system was mainly created by Iris. At that time, I was working on other gameplay features, so the basic dialogue system was assigned to Iris for implementation.