Before starting the playable demo, I conducted research and planning for the puzzle section and level structure. Based on my own gaming experience, I organized the ideas I had regarding puzzles and level structures into a PDF document for the team to discuss.
This document includes the functions of different level areas within the game scene, possible puzzle themes, types of puzzle interactions, and how the swimming pool can simultaneously support the game experience and emotional narrative.
The main objective of this study is to integrate GDD with actual level design. I do not merely want to design the room as an empty space; instead, I hope each area has a clear function: The entry area is used to guide activities, providing sufficient teaching for the players, allowing them to familiarize themselves with how to control their characters. The main area serves as the central space, which will contain the core puzzles and core mechanisms, while the auxiliary rooms include smaller puzzle challenges related to memory objects, such as the Butterfly Book, the First Painting, and Cutty.
The contents include:
The components and functions of the game levels (beginner level, main level, secondary level)
The themes of the puzzles (butterfly book, the first painting, Cutty)
The types of puzzles (collecting fragments, visual change-solving, maze, jigsaw, jumping through levels)
The research on the pools and their manifestations in the game (changes in pool water, emotions represented by pool water color)
Some hand-drawn schematic diagrams of items by myself (butterfly book, Cutty, game map)
This PDF was originally used as an early planning document to convey my ideas for the puzzle and level structure to the team. Its purpose was to provide the team with suggestions regarding gameplay and level structure.
(Looking back, this document played a very positive role for our team during our discussions on the level structure and puzzles at that time, helping us quickly determine the general development direction.)
After our face-to-face discussion, we initially determined the game’s mechanics(Climbing mechanism and perspective change mechanism) and the design of the puzzle is centered around these two mechanisms. I can now start working on my prototype.
The implementation of the climbing mechanism in Honkai: Star Rail
We took the climbing interaction mechanism in Honkai: Star Rail as a reference, as it presents climbing as a simple and understandable movement mechanism.
Players can clearly understand which surfaces are suitable for climbing and how this movement can be combined with exploration. This influenced our discussion on the climbing mechanism: we hope this mechanism is easy to understand rather than requiring complex control methods.
Moreover, if this mechanism can be successfully applied to our game, it means that the wall ears and ceilings that originally served to separate rooms can also become part of the player’s exploration and game narrative.
By the end of the fourth week, I had completed the first version of the game sandbox. Since the climbing and perspective-switching mechanisms, as well as the art resources, are still under development, I am unable to construct the final puzzle-solving process yet. Therefore, I temporarily use basic movement and jumping as testing tools to evaluate the scale of the environment, movement speed, jumping height, and the spacing between platforms.
This was a pragmatic decision. Although the jumps were not planned as the main gameplay element of the final game, they enabled me to make the space playable and test whether the levels seemed too empty or too large. At the same time, this also provided the team with a physical environment that was convenient for adding and testing various mechanisms in the future.
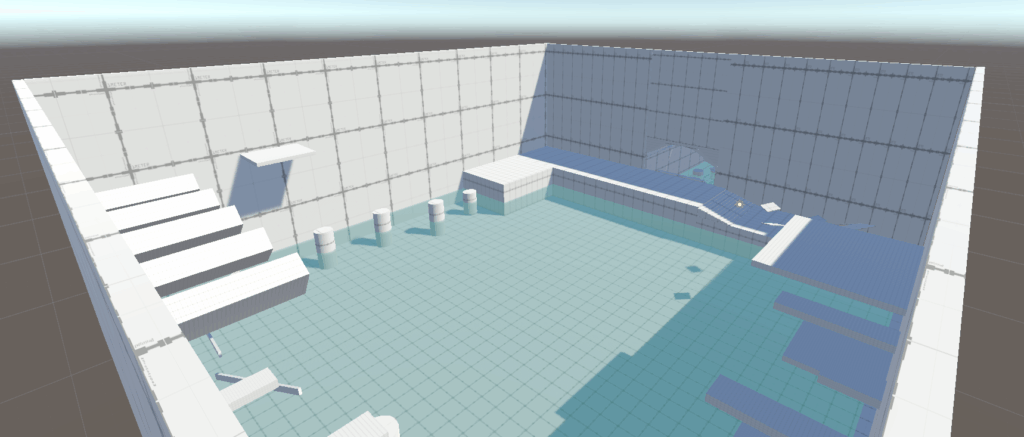
The early construction of the white-box level
This temporary layout based on jumps is partly inspired by the jumping mode I played in “Cross Fire” before. This mode mainly creates playable challenges through movement, spacing, rhythm, and object placement, rather than relying on complex systems and mechanisms to support gameplay.
From this reference, I learned that even the simplest mechanisms, as long as the spatial layout provides clear goals for the players and presents progressive difficulty, can effectively stimulate participation and challenge.
I will only adopt this idea as a temporary white-box solution for adjustment. My intention is not to turn the game into a platform game, but to ensure that the early prototype does not appear empty during the period when the main mechanics are still under development. This also enables me to test the vertical sense, player movement, and path readability, as well as the feasibility of visual and spatial guidance, such as whether players can find the correct path in the game without relying on textual instructions, by using visual and spatial guidance like lights and ramps.
Reflection
This week, I realized that level design involves not only conceiving the game’s creative gameplay and planning the layout of the levels, but also testing the feasibility of these ideas in a playable environment. Although the climbing and perspective-switching mechanisms are not yet complete, by using temporary jumping challenges, I was able to assess the scale of the levels, the way players move, and the readability of the space.
This process has made me realize the significance of prototype creation and iterative refinement in level design. Design documents can convey ideas, but only through playable prototypes can potential issues be identified and improved. In future development, I will continue to combine planning with actual testing to create a better gaming experience.