
2D Movement
This script provides basic WASD player movement using Unity’s 2D physics system.
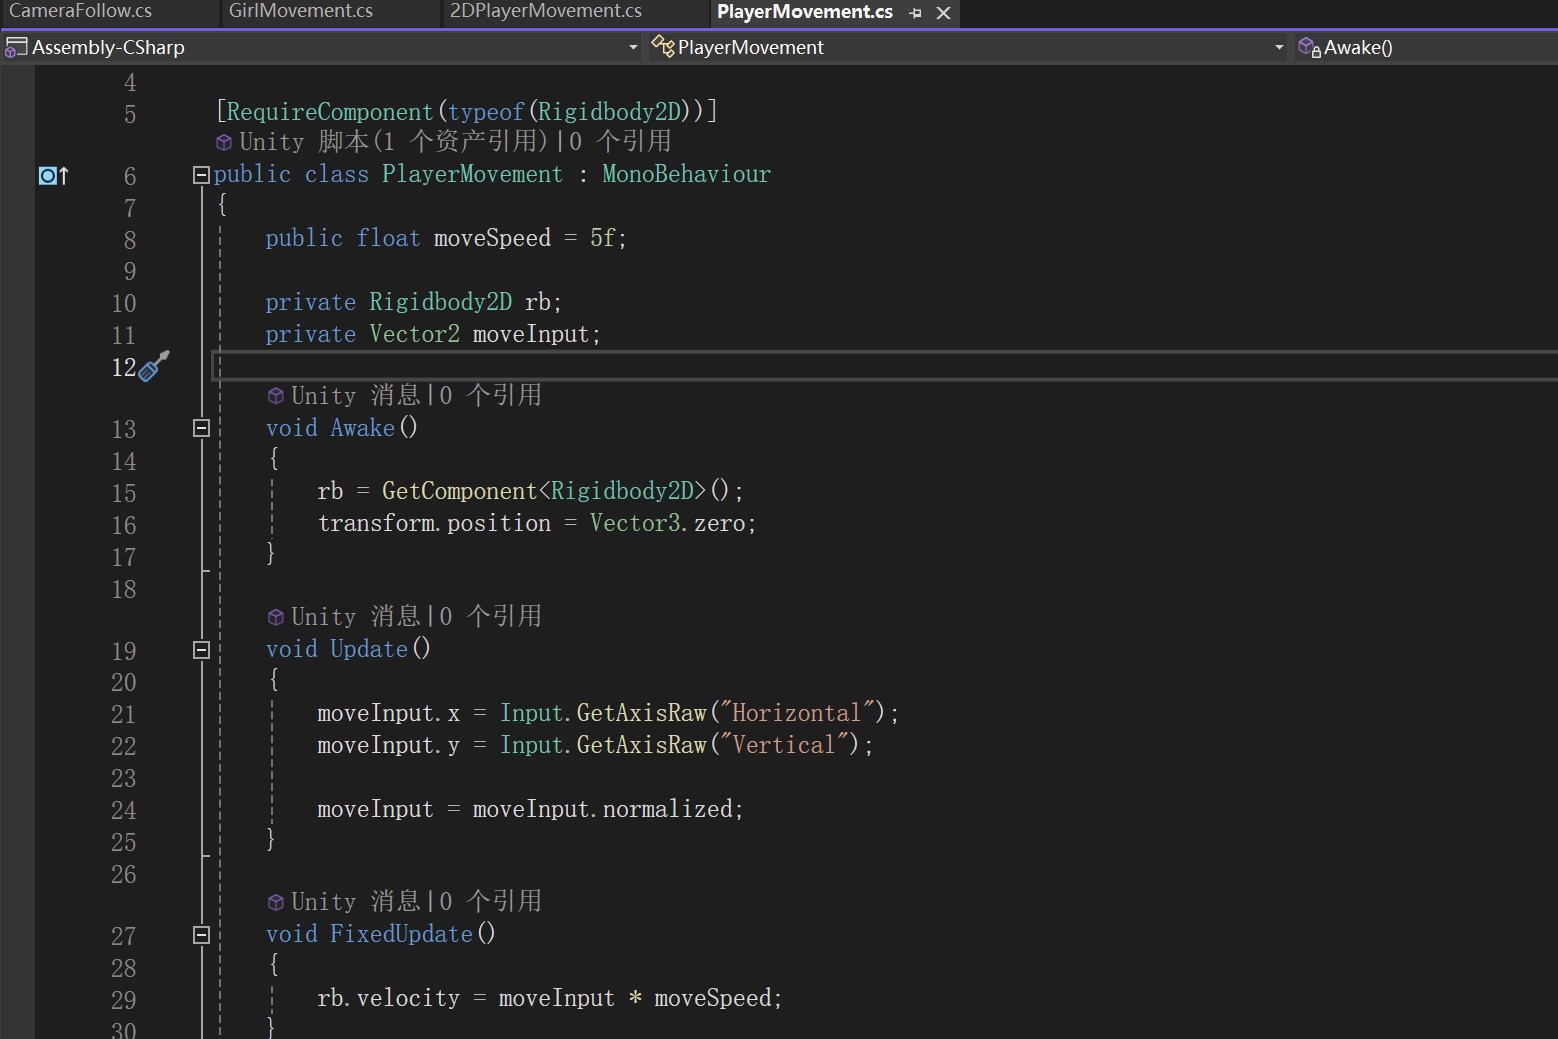
First, the script requires a Rigidbody2D component, ensuring that the player object uses physics-based movement. In Awake(), it retrieves and stores a reference to the Rigidbody2D and sets the player’s starting position to (0,0,0).
In Update(), the script reads horizontal and vertical input using Input.GetAxisRaw(“Horizontal”) and Input.GetAxisRaw(“Vertical”). These correspond to the WASD or arrow keys. The input values are stored in a Vector2 called moveInput, and then normalised to prevent diagonal movement from being faster than movement in a single direction.
In FixedUpdate(), the script applies movement by setting the Rigidbody’s velocity to moveInput * moveSpeed. Because this is done in FixedUpdate(), it ensures smooth and consistent physics-based movement.
2.5D Movement
Although our game visually appears 2.5D (a 2D sprite in a 3D environment), the player movement script must be implemented using Unity’s 3D physics system. I adapted my knowledge of 2D movement scripts and applied it to a 3D setup so that a 2D character sprite could move naturally within a 3D scene.

First, the script reads horizontal and vertical input from the player. It converts it into movement along the X and Z axes, allowing the character to move left, right, forward, and backwards within a 3D environment.
The movement vector is normalised to ensure consistent speed in all directions, and the Rigidbody’s velocity is updated in the physics loop to create physics-based motion.
Since the character uses 3D physics, all rotation is frozen to prevent it from tipping over when colliding with objects.
The script also handles visual feedback: when the player moves left or right, the sprite is flipped horizontally by adjusting the SpriteRenderer, and the Animator is updated to switch between idle and running states based on movement input.
Compared to a 2D movement script, the main difference is the use of a 3D Rigidbody and Vector3 instead of Rigidbody2D and Vector2. In 2D, movement typically happens along the X and Y axes, whereas in this 2.5D setup, movement occurs along X and Z, with Y reserved for height. Collision handling and physics behaviour also follow 3D rules.
Leave a Reply