The video shows Checkout and Door-Opening System:
Checkout and Door-Opening System:
Setup Sliding door:
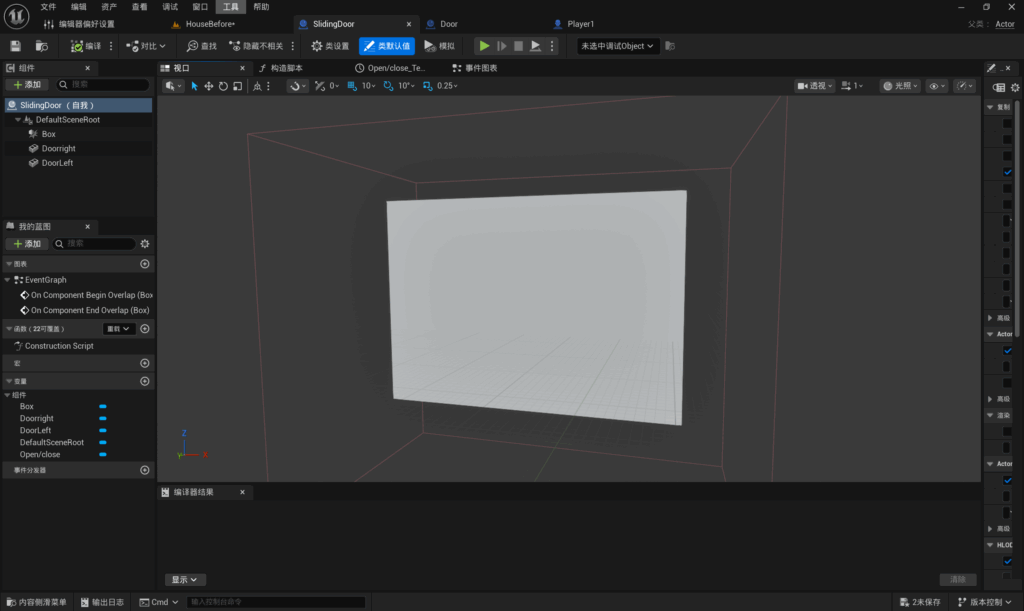
I created a blueprint class, generating two cuboids representing the left and right sides of the door respectively. Additionally, I established a box collision volume; when the player collides with this collision volume, an event is triggered.
Sliding door blueprint:
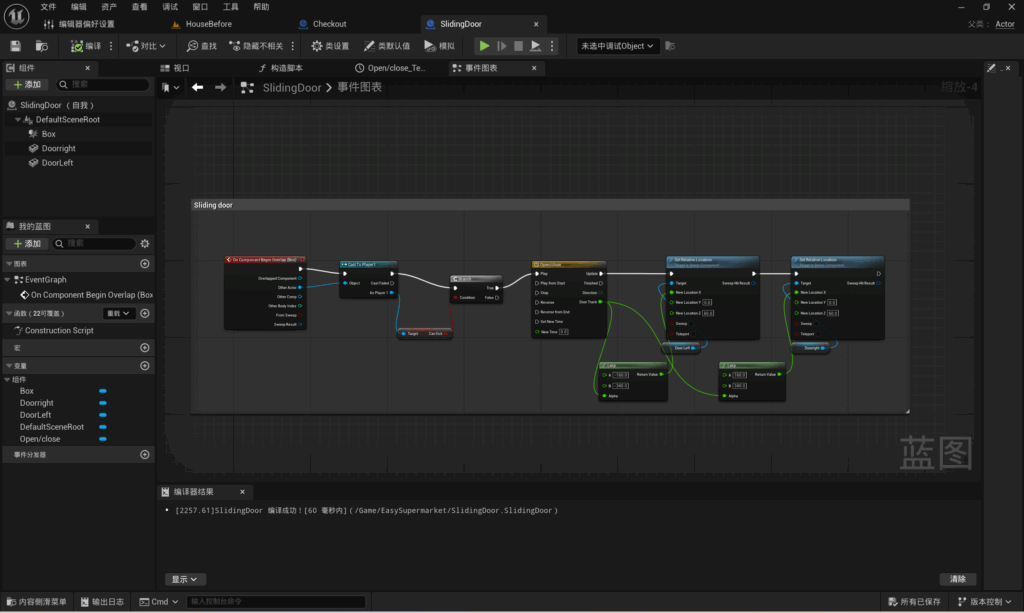
My blueprint concept is as follows: this event triggers when an actor’s collision volume overlaps with a door. By converting the actor to the player, the event only activates when the player’s collision volume overlaps. Create a timeline, retrieve variables for the left and right doors, and set their positions. Establish two Lerps, manually adjust the doors’ positions within the viewport to confirm their opening angles, then input these values into the Lerps.
Aim of sliding door:
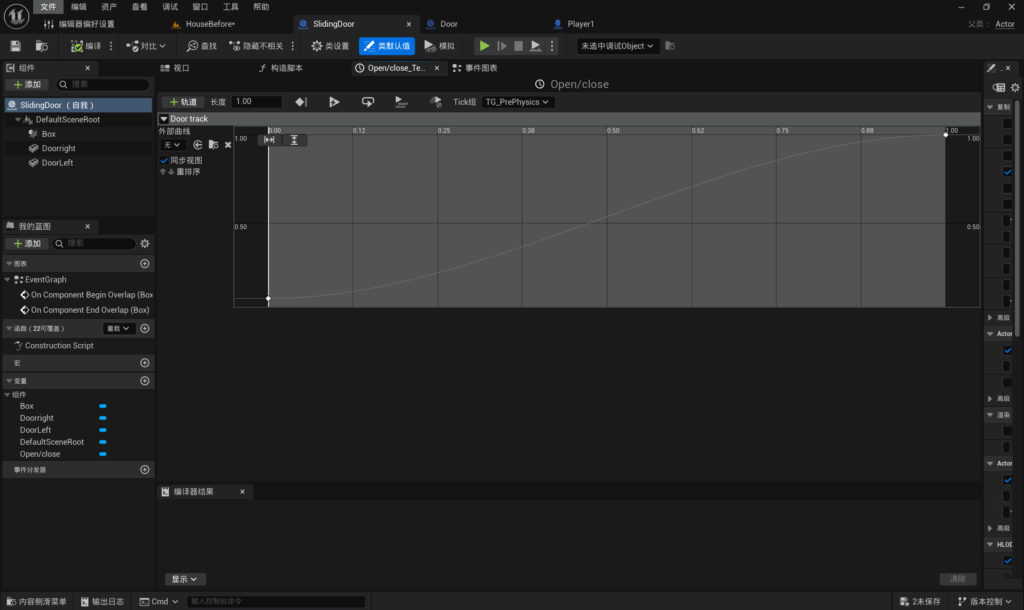
I created an opening animation lasting one second. The transitions at the beginning and end are slightly smoother, making the opening animation appear more natural.
Checkout Blueprint:
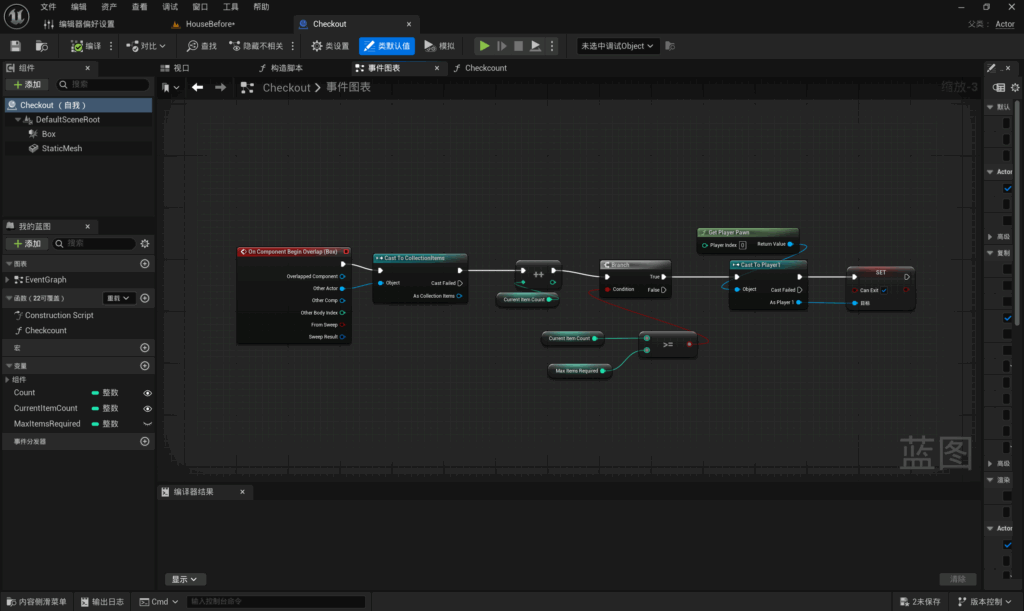
First, I recreated a blueprint class for the till counter, generated a cube, and established a box collision volume.
I have also created a blueprint class for all items and added a variable that allows altering the appearance of items while utilising the same blueprint class.
My blueprint concept is as follows: trigger an event when an actor overlaps with a collision volume. Convert the actor into an item, ensuring the event only fires when the item overlaps with the collision volume. Retrieve the current item count and the maximum item count; if the current count is greater than or equal to the maximum count, the condition is met. Convert the actor into a player and set a function named “exit”. Once the condition is satisfied, the player may depart.
Leave a Reply