This video shows shopping list system:
Shopping List System:
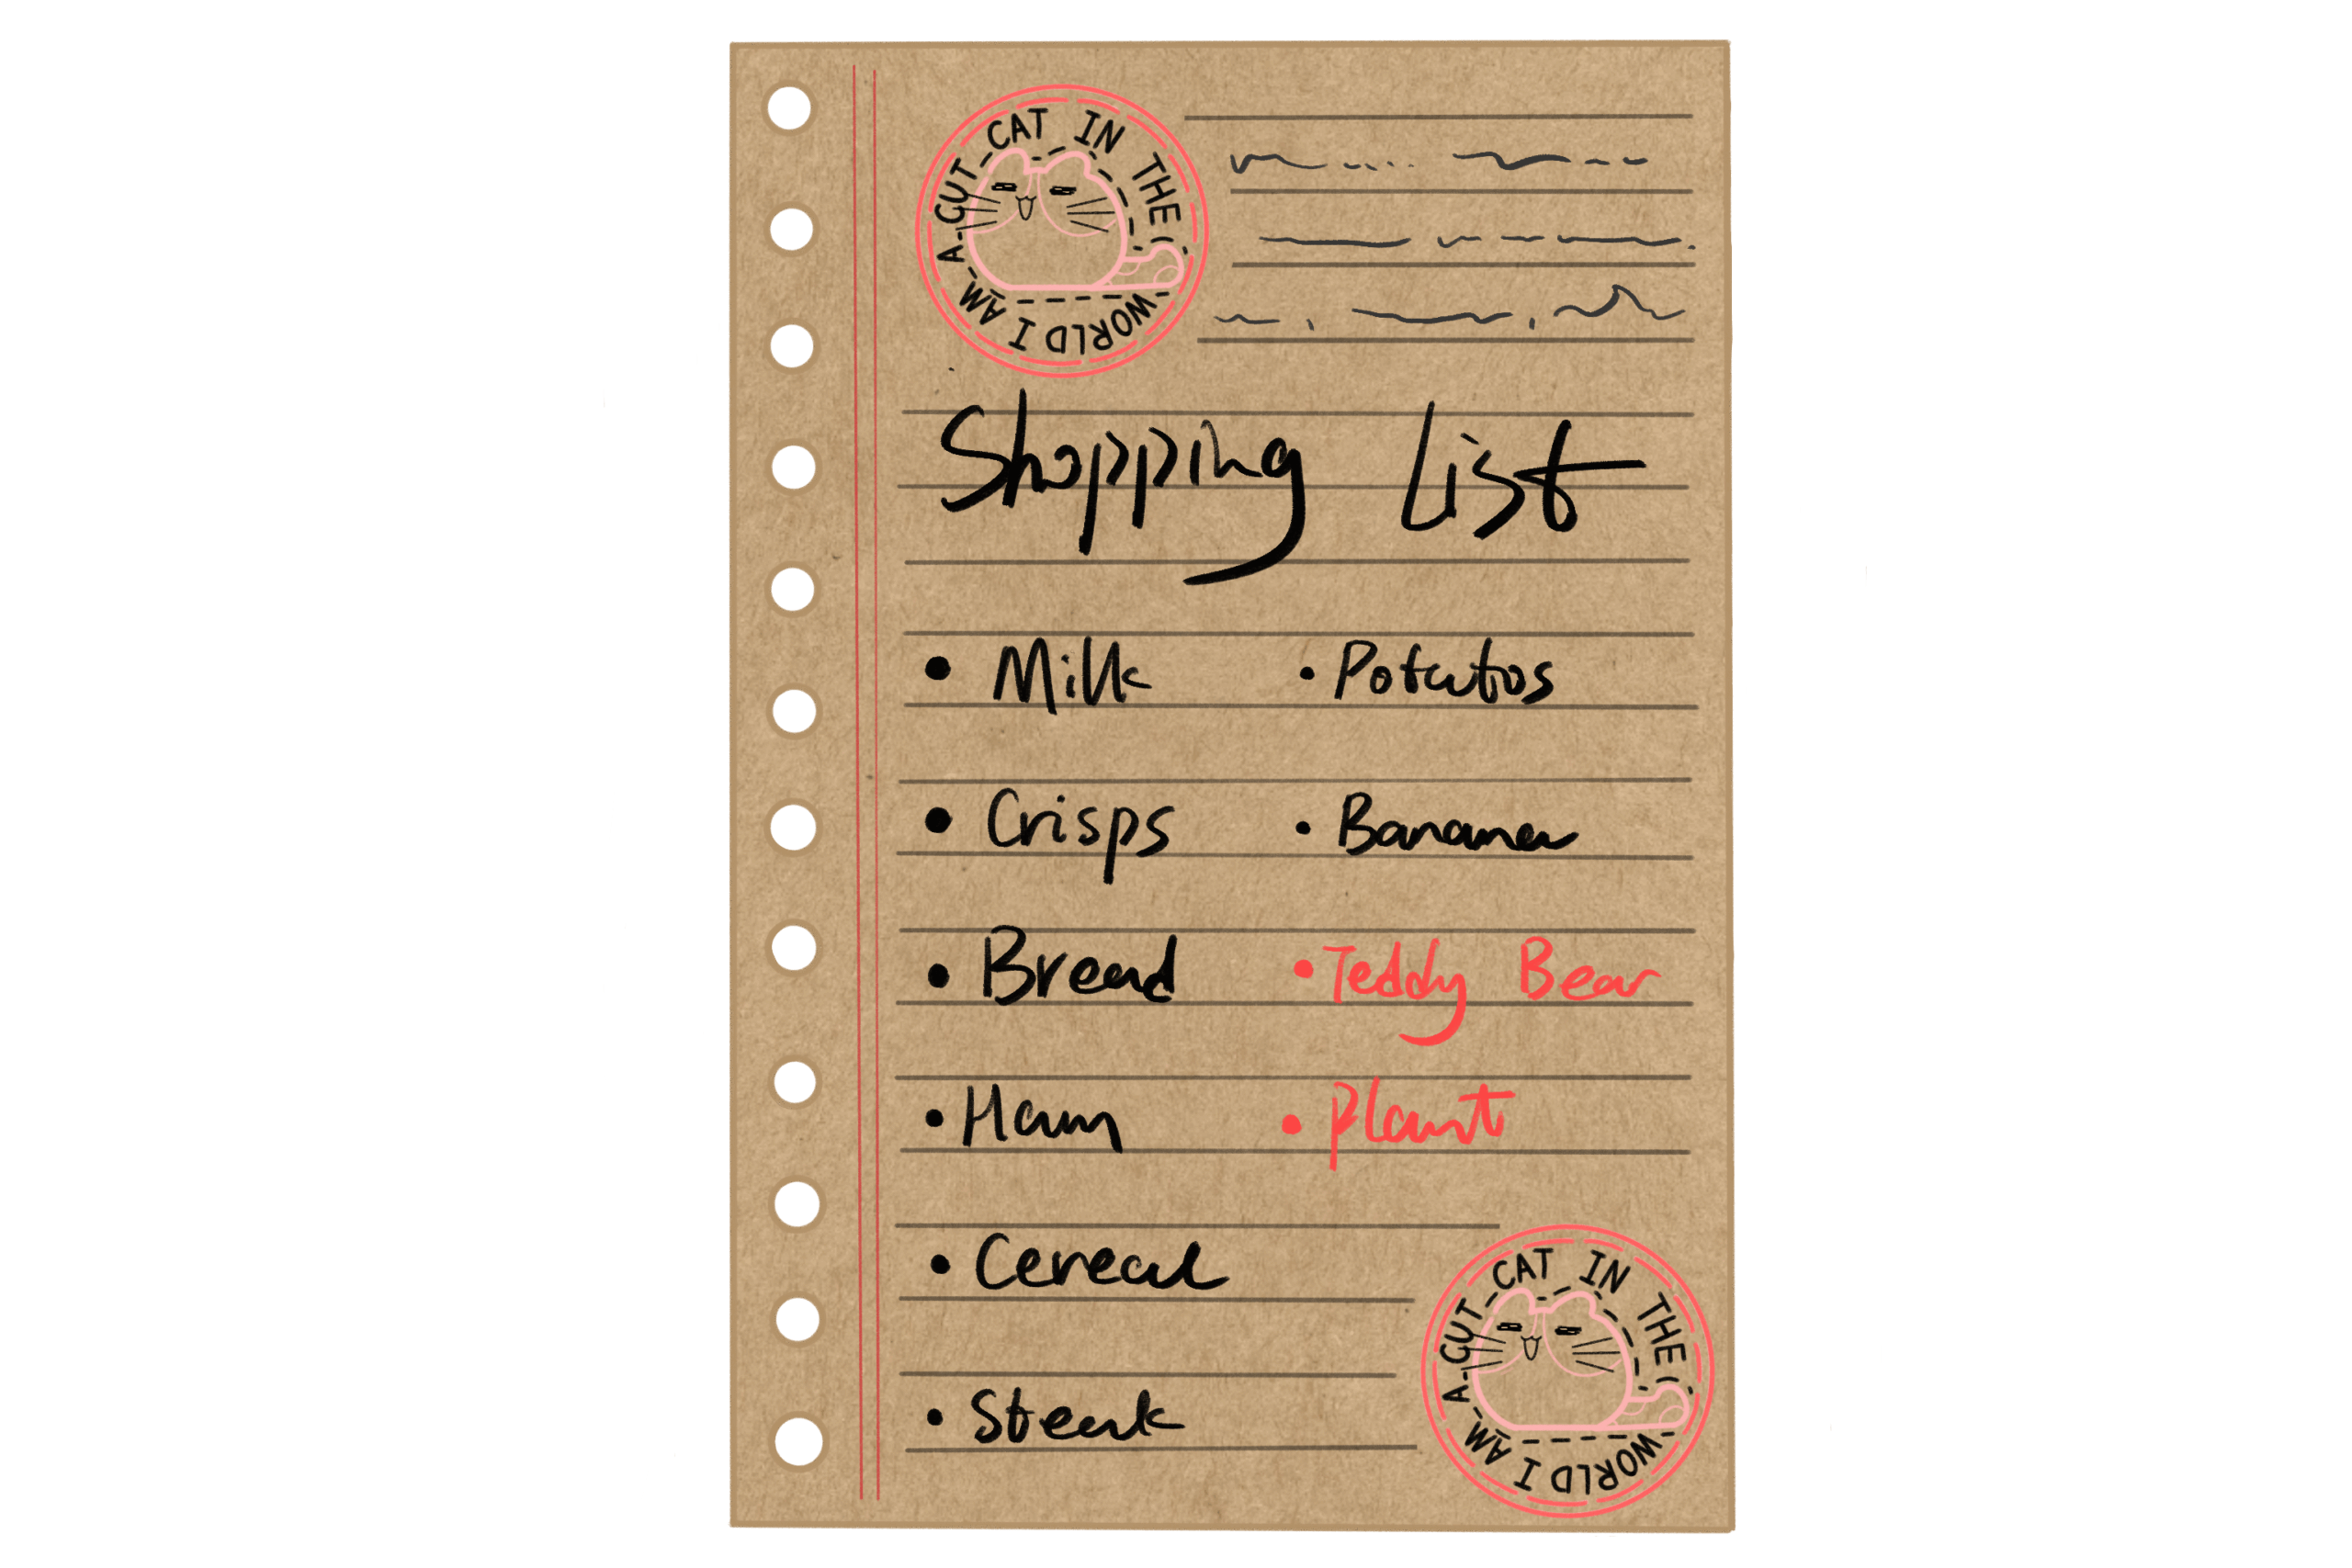
I began by designing a shopping list in Procreate. I drew inspiration from the style of brown paper sticky notes and loose-leaf paper. I designed two little cat stamps to place in the corners of the shopping list, which help to highlight the characters’ personalities and add depth to their backstories. The text on the shopping list is handwritten; I ensured that it retained a handwritten feel whilst remaining legible.
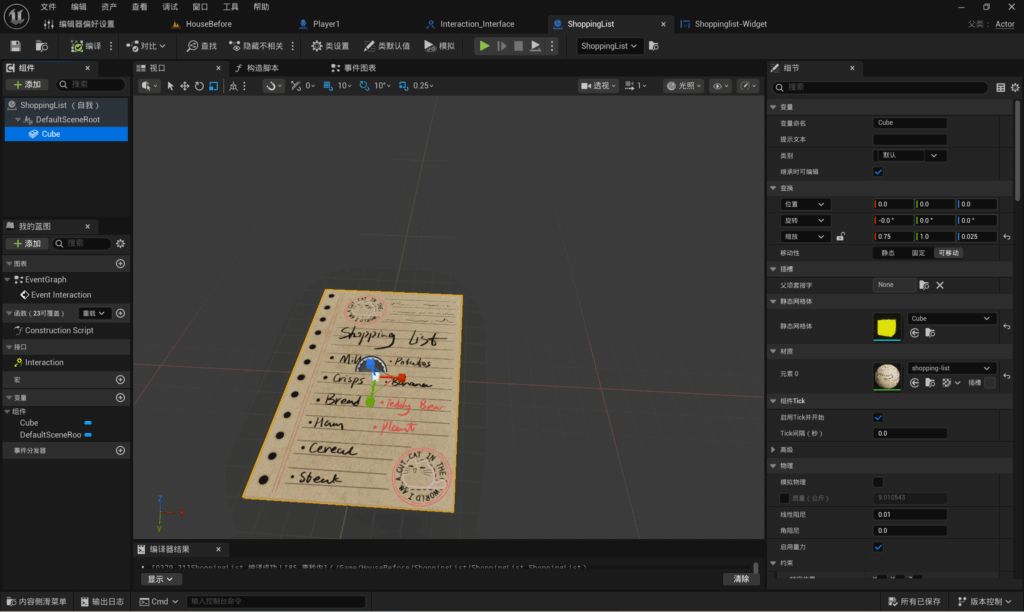
The second step was to turn a PNG image into an interactive object in UE5. I imported the shopping list PNG image into UE5. I created a new Blueprint class, added a cube to it, and adjusted the cube to resemble a sheet of paper.
I right-clicked on the imported PNG image to create a material for it. In the cube’s Blueprint class, I selected the PNG material, so that the texture is perfectly mapped onto the cube, with the material visible on every face. Now, a single image has become a 3D object that can be placed in the scene.
Blueprint of shopping list widget:
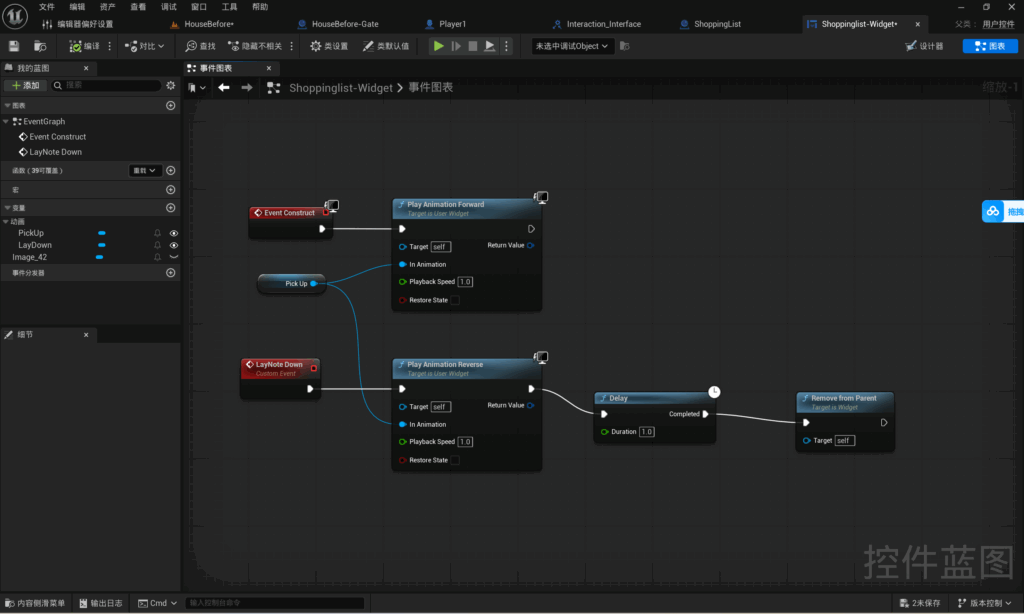
First, I created a user control. Within the user control, I added a canvas panel; within the canvas panel, I placed an image of a shopping list in the centre of the screen and applied a blurred background effect. I created an animation called ‘Pickup’. This animation lasts one second. At 0 seconds, the image’s Y-coordinate is set to -1100, ensuring the image is off-screen. At 1 second, the Y-coordinate is set to 0, ensuring the image returns to the centre of the screen. Additionally, at 0 seconds, the background blur is set to 0, and at 1 second, it is set to 3, ensuring that the background gradually blurs during the pickup animation.
The animation begins to play when the UI loads. Retrieve the ‘Pickup’ animation and set the animation to play to ‘Pickup’. Next, define a custom event named ‘LayNoteDown’ (which plays the animation for putting the shopping list down). When this event is triggered, play the animation set to ‘Pickup’, and after the animation has finished playing, introduce a 1-second delay. After the 1-second delay, the user control is removed from the screen.
Blueprint of shopping list:
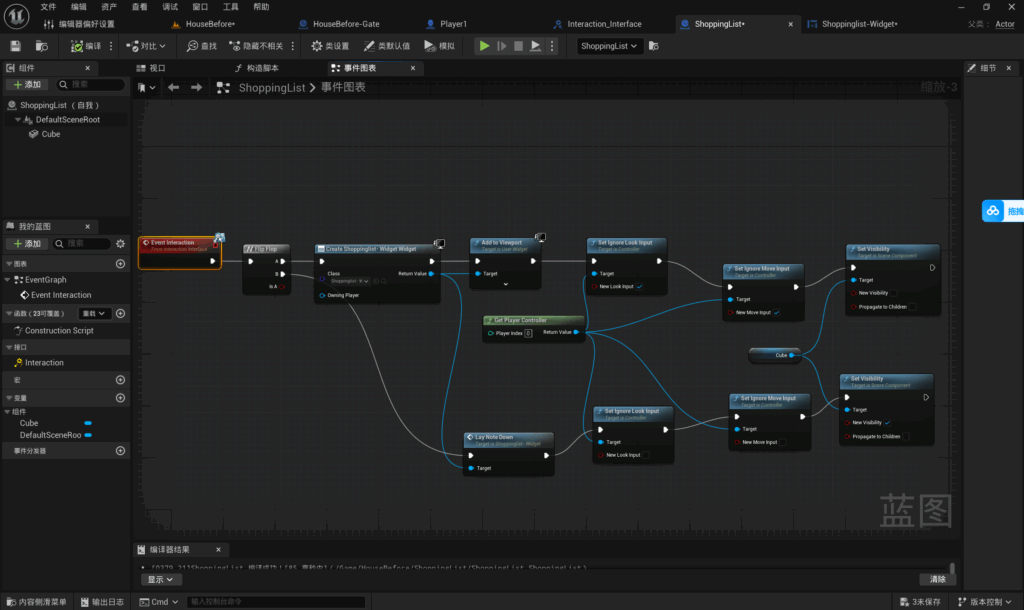
The blueprint is triggered when the player interacts with an item. When the player clicks the shopping list for the first time, the user control that was just created opens. The player controller is retrieved, and the player’s movement and camera view are locked to ensure the player does not move erratically whilst the UI is open. The item is set to fade out during the animation to maintain the player’s sense of immersion.
When the player clicks again, the item drop animation is triggered. Retrieve the player controller, lock the player’s movement and camera view to ensure they cannot move around whilst the UI is open. Retrieve the shopping list and set the items to appear, ensuring they reappear in the scene once the drop animation has finished.
Blueprint of player:
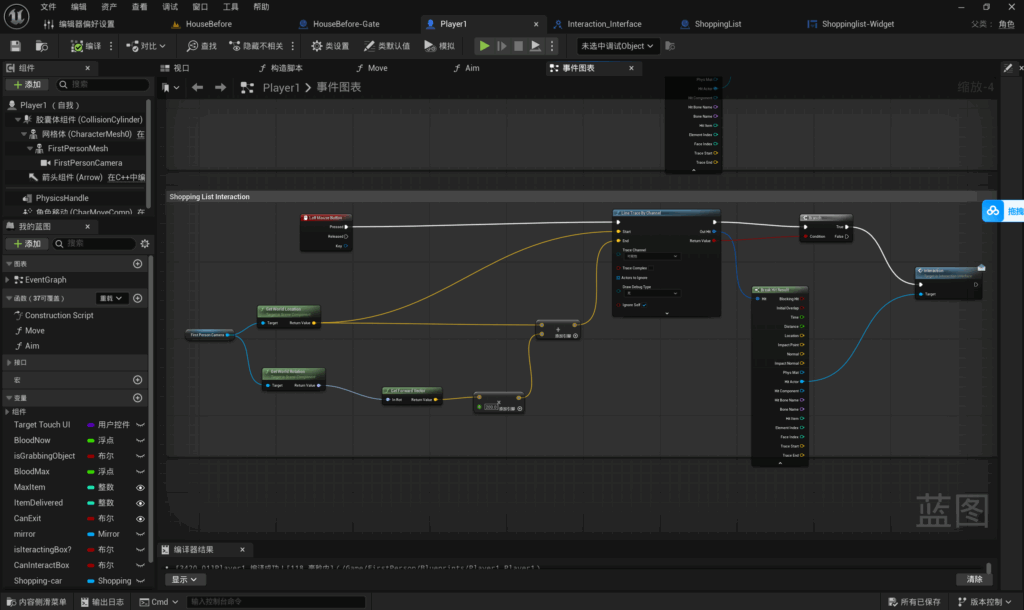
Interaction detection begins when the player clicks the left mouse button. The player’s camera is retrieved and the detection range is calculated. The camera’s position is obtained, and the area within a 200-unit radius in front of the player is determined; these are combined to yield the final detection range. If an object is detected within this range, the interaction interface is called.
Leave a Reply